Sumo Bots Timeline
Day 1:
Topics: Gear Ratios, Gearbox, Winning Sumo Bot Designs
Over the next 15 classes we will be designing and building simple “sumo robots”.
You will learn a variety of ways to design a sheet metal body, wire a controller to control 2 dc electric motors, and choose a gearbox design that goes along with your personal strategy to win the class competition.
Over the course of the project students are expected to keep a building journal of their:
1) ideas
2) designs
3) blueprints.
Personal research before our formal in-class learning:
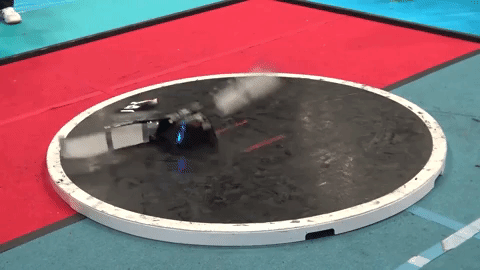
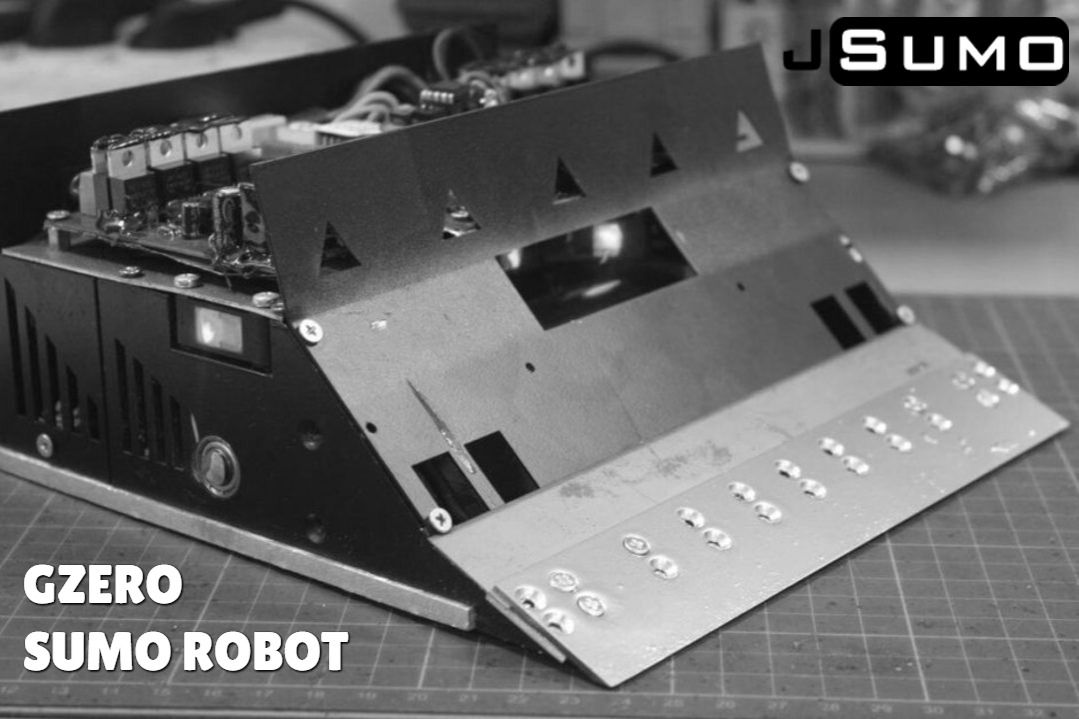
Sumo bots competitions are all around the world and there is a variety of ways to build and compete. Ours will be using the Tamiya Double Gearboxes and used a tethered controller.
Today’s research: Begin gathering ideas that relate to the following topics. This should include written work and drawings
• Gearboxes and how they relate to small robots (like what we will be building)
• What do these gear ratios mean and how can you utilize them in a sumo bot?
o 344 : 1
o 38 : 1
o 114 : 1
o 12 : 1
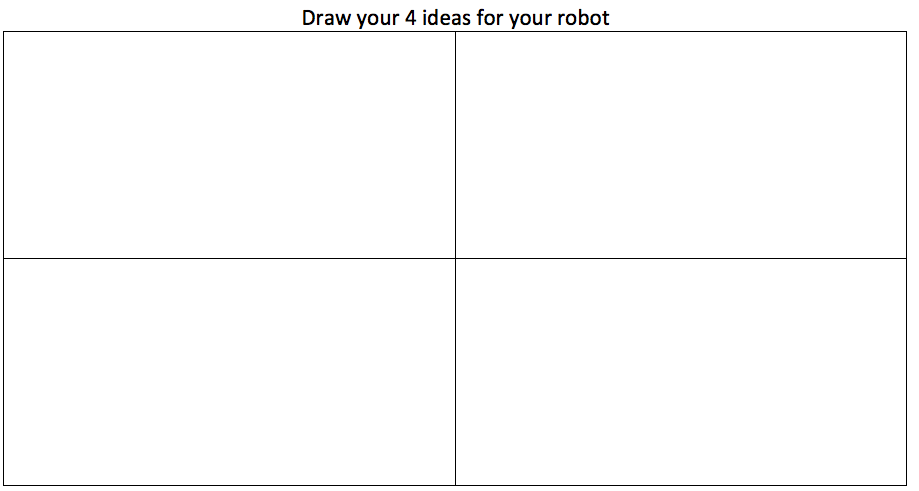
Begin some design sketches. 4 minimum body designs
o Orthographic, isometric, etc. These are just a start ! Why chose your design? What is it’s purpose? How will it work for offence and defence?
Topics: Gear Ratios, Gearbox, Winning Sumo Bot Designs
Over the next 15 classes we will be designing and building simple “sumo robots”.
You will learn a variety of ways to design a sheet metal body, wire a controller to control 2 dc electric motors, and choose a gearbox design that goes along with your personal strategy to win the class competition.
Over the course of the project students are expected to keep a building journal of their:
1) ideas
2) designs
3) blueprints.
Personal research before our formal in-class learning:
Sumo bots competitions are all around the world and there is a variety of ways to build and compete. Ours will be using the Tamiya Double Gearboxes and used a tethered controller.
Today’s research: Begin gathering ideas that relate to the following topics. This should include written work and drawings
• Gearboxes and how they relate to small robots (like what we will be building)
• What do these gear ratios mean and how can you utilize them in a sumo bot?
o 344 : 1
o 38 : 1
o 114 : 1
o 12 : 1
Begin some design sketches. 4 minimum body designs
o Orthographic, isometric, etc. These are just a start ! Why chose your design? What is it’s purpose? How will it work for offence and defence?
|
|
|
Day 2:
Body Design
Previously we covered Gearboxes. If you do not have a clear understanding for which gear ratio you might find ideal for the sumo bot project please revist last days information to get clarification.
Today we will concentrate on robot body design. What makes a good design? It can be said that a good design is the one that works. But in this case a good design is one that works BETTER than your competition!
Things to think about while working today in no particular order
• How do you attach the motor to the chassis (bottom body of the robot)?
• Where do the batteries (optional) go? How do you change them?
• Will this meet the size limitations?
• Will you be able to access the motors and gearbox in the event something breaks? Are the wheels and body shown the correct size? Will wheels move the robot or “tank treads”?
• If the chassis is curved, how will you make that curve out of sheet metal?
• If you want to add weights later on, where will you put them (500g weight limit)?
Get a teacher initial before moving onto the next step!
Step 1:
Using your research from day 1 you should finalize your 4 sketches (side and front view minimum for each) to a decent level.
Teacher initial: ______
Step 2:
Discuss your favorite design with me for my thoughts (pros and cons) before moving onto Step 3. You should be able to list the reasons for your design and why you have added specific parts.
Teacher initial: ______
Step 3:
Move on to a full scale 2-view orthographic drawing of your robot, complete with title block, border, etc. Bonus for an isometric drawing. You will not receive a gearbox until this drawing is to the teacher’s satisfaction.
• Drawing should include specific dimensions
• Pieces that overlap should have holes that line up for fastener locations
• Robots should have a minimum of 2 wheels (you can add more). Figure out your size and the material you plan on using. How will you add “grip” to your wheels? Drive axle size is 1/8” in diameter
Teacher initial: ______
Day 3:
Wheels keep on turning....
A big design issue that has come up in past years is creating wheels that will actually fit. People have made wheels that fit the spinning axle but don't touch the ground or have enough grip/traction to actually move anywhere. We have made wheels from wood (cut round, drilled a hole in the middle) and wrapped rubber bands around it. We have used solid round aluminum on the lathe to create a wheel that "bolts" to the axle using a set screw.
Today you are expected to have figured out the dimensions of your wheels (diameter, width, etc) and a design that looks rad but also buildable.
Continue with your blueprints and orthographic drawings. Measure the sample gearbox to figure out your exact sizing. Different gear ratios may result in the axle coming out of a different hole than the sample.
As you design the body you will also need to make sure you are able to build it. We will be creating paper/cardstock template prototypes as our next step to make sure your sheet metal body can actually be built. Once your blueprints have been created to teacher satisfaction you will get your gearbox and a plastic bag to keep your parts. If you loose your kit you can purchase another one for $15. DO NOT LOOSE YOUR KIT!
Day 4:
Paper prototype day!
After your sketches pick one and have your orthographic drawing ready to begin a basic paper prototype. You should include hems/bends that overlap your top/side/bottom pieces so that you can put your robot together with fasteners and take it apart to make changes if necessary to the motor/wiring.
This may take a few tries! DO NOT GO CRAZY AND PUT TAPE EVERYWHERE. You should be able to take your paper version apart if needed to trace onto your sheet metal/plastic/wood and create your needed parts for the body of your robot. This will also help when you go to make final orthographic plans for your robot body.
Day 5:
Once you have a paper prototype and a rough (or exact) idea of where your gearbox will be it is time to start building your gearbox. Keep your paper prototypes safe or under some of the tape so you have a flat packed IKEA style set of pieces that you can use to trace onto sheet metal at a later date. I hope you included hems/bends that allow for it to be modular and come apart easily for gearbox wiring and installing any fasteners!!
Once you have a paper prototype and a rough (or exact) idea of where your gearbox will be it is time to start building your gearbox. Keep your paper prototypes safe or under some of the tape so you have a flat packed IKEA style set of pieces that you can use to trace onto sheet metal at a later date. I hope you included hems/bends that allow for it to be modular and come apart easily for gearbox wiring and installing any fasteners!!
Day 6:
Today is all about getting things rolling.... You need to determine what size wheels and what material(s) you plan on using. The easiest is wheels made out of plywood. Before cutting out the outside you need to have a hole for the axle directly in the middle. Use a divider to draw your circle. If your wheel is perfectly round but the center point is not perfect you'll get some wobble goin'! Drill your holes with a 1/8" drill bit. Cut out the outside of the circle with our scroll saw or bandsaw and use the belt sander to smooth it out SLOWLY. I always recommend using elastic bands or a stretched out balloon to add GRIP to your wheels.
Today is all about getting things rolling.... You need to determine what size wheels and what material(s) you plan on using. The easiest is wheels made out of plywood. Before cutting out the outside you need to have a hole for the axle directly in the middle. Use a divider to draw your circle. If your wheel is perfectly round but the center point is not perfect you'll get some wobble goin'! Drill your holes with a 1/8" drill bit. Cut out the outside of the circle with our scroll saw or bandsaw and use the belt sander to smooth it out SLOWLY. I always recommend using elastic bands or a stretched out balloon to add GRIP to your wheels.
