Sumo Bots
Students will be given a Tamiya Double Gearbox 4-speed set, sheet metal, and the necessary electronic parts to create a tethered sumo bot. Students will also be provided with a large Ziplock back to store parts. It is recommended that student invest in a small toolbox to store their parts. You can never have enough toolboxes in your home! (link to a cheap one! www.canadiantire.ca/en/pdp/certified-tool-box-13-in-0581185p.html#srp )
There are no spare parts for the robot kits so extreme care must be taken to ensure pieces are not lost. Students are responsible for keeping their projects safe at all times, both in and out of class. I will not be providing a storage space for these as the parts are so small.
Project Time:
I am expecting this project to use up to 15 hours of class time to teach and allow design and construction of the robots
Timeline:
Gearbox Construction:
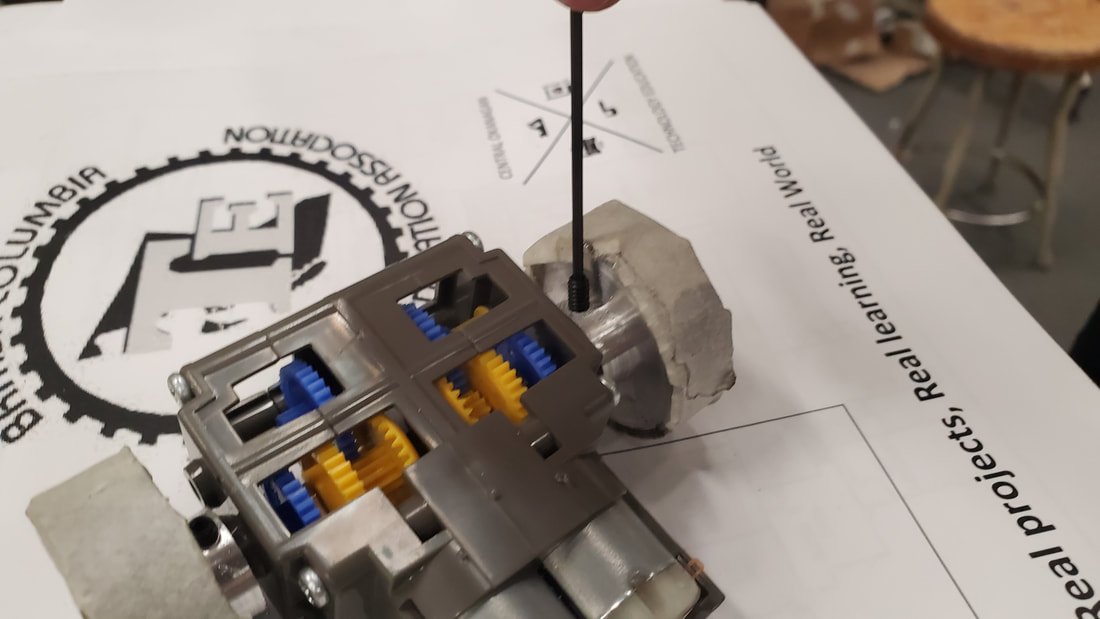
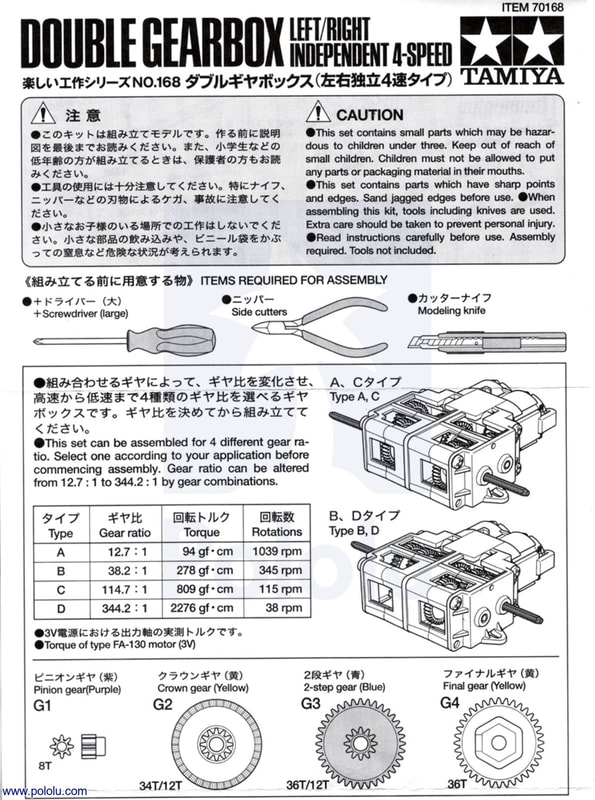
The Tamiya double Gearbox set is capable of 4 different gear ratios depending on your strategy
Possible Gear ratios:
https://sciencing.com/simple-gear-ratio-explained-6651403.html
Visual Gear Ratio website: geargenerator.com
Here is a video covering the assembly of the gearbox:
There are no spare parts for the robot kits so extreme care must be taken to ensure pieces are not lost. Students are responsible for keeping their projects safe at all times, both in and out of class. I will not be providing a storage space for these as the parts are so small.
Project Time:
I am expecting this project to use up to 15 hours of class time to teach and allow design and construction of the robots
Timeline:
- teaching on gear ratios
- Gearbox assembly
- Sheet metal design, bending, and cutting
- Build Build Build!
Gearbox Construction:
The Tamiya double Gearbox set is capable of 4 different gear ratios depending on your strategy
Possible Gear ratios:
- 344.2 : 1
- 38.2 : 1
- 114.7 : 1
- 12.7 : 1
https://sciencing.com/simple-gear-ratio-explained-6651403.html
Visual Gear Ratio website: geargenerator.com
Here is a video covering the assembly of the gearbox:
Links for gearbox assembly:
www.instructables.com/id/How-to-assemble-the-Tamiya-twin-motor-gearbox-ch/
www.instructables.com/id/How-to-assemble-the-Tamiya-twin-motor-gearbox-ch/
Requirements:
Size: Robots must fit inside a 13x13cm square. Robots will have a height restriction of 20cm and a total weight restriction of 500grams
Robots parts may fold down after official "weigh in" and measurement
Power: During competition robots will be powered by a teacher set power supply for a fair battle.
Robots Speed: Speed of your robot will be determined by the gear ratio you choose and the size of your wheels
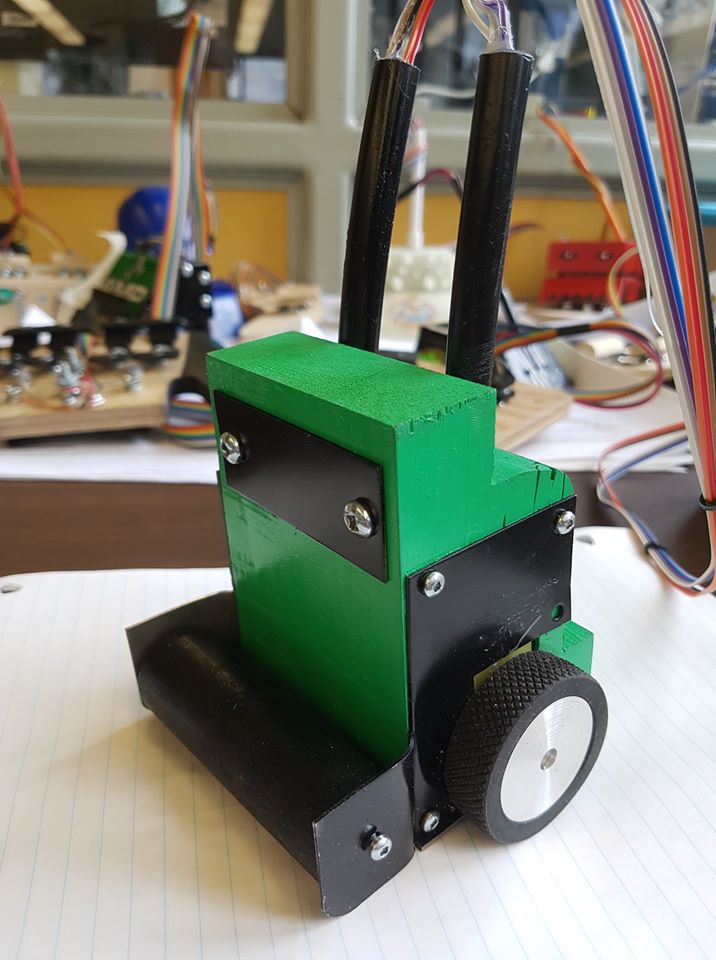
Antennae: a "flagpole" style antennae should be used to get your wires up in the air so they do not get tangled during battle
Loopholes and cheating: You cannot tape your robot down to the ring creating a stuck brick. The judge should be able to pick up your robot without it being stuck to the ground
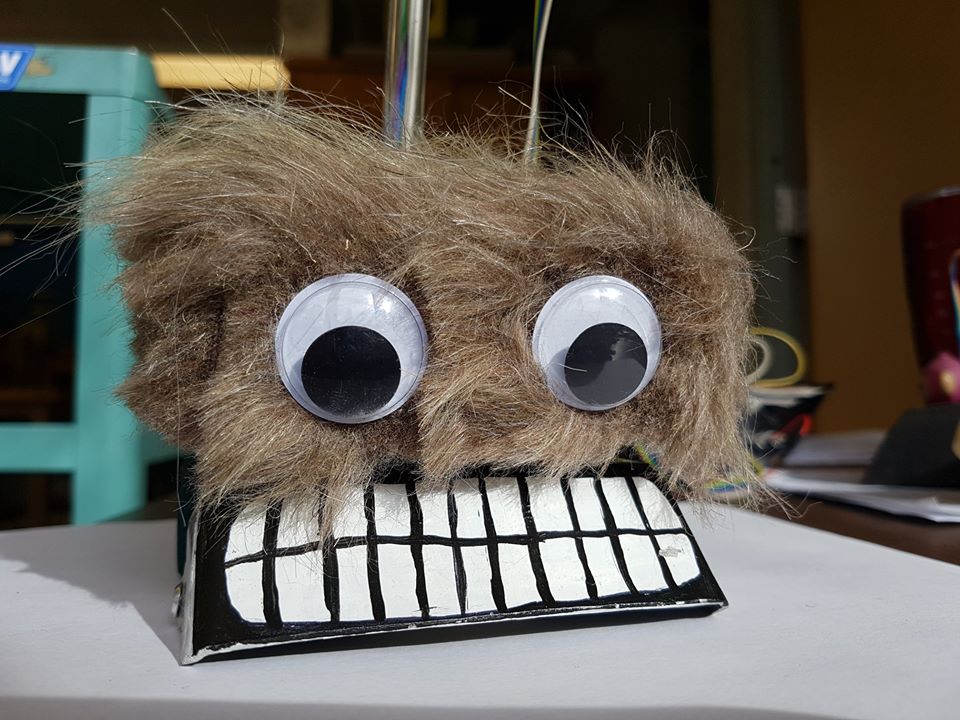
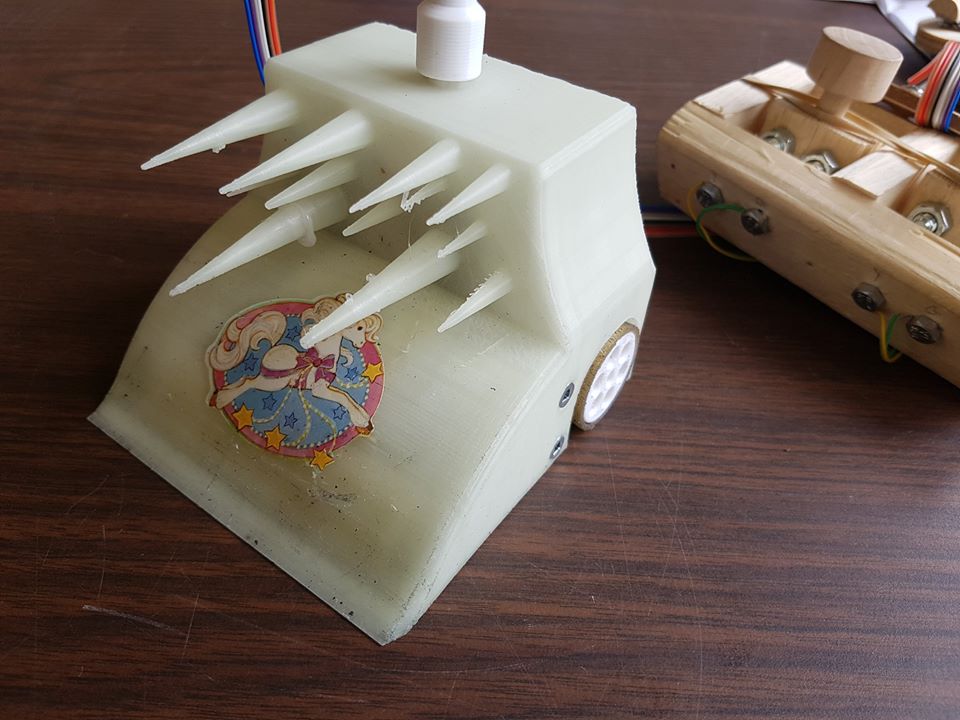
Weapons: While the winner is determined on who is pushed from the ring you are allowed to add some sort of offense to your robot as long as it all fits within the size limit. No fire or things that can cause permanent damage to your opponent
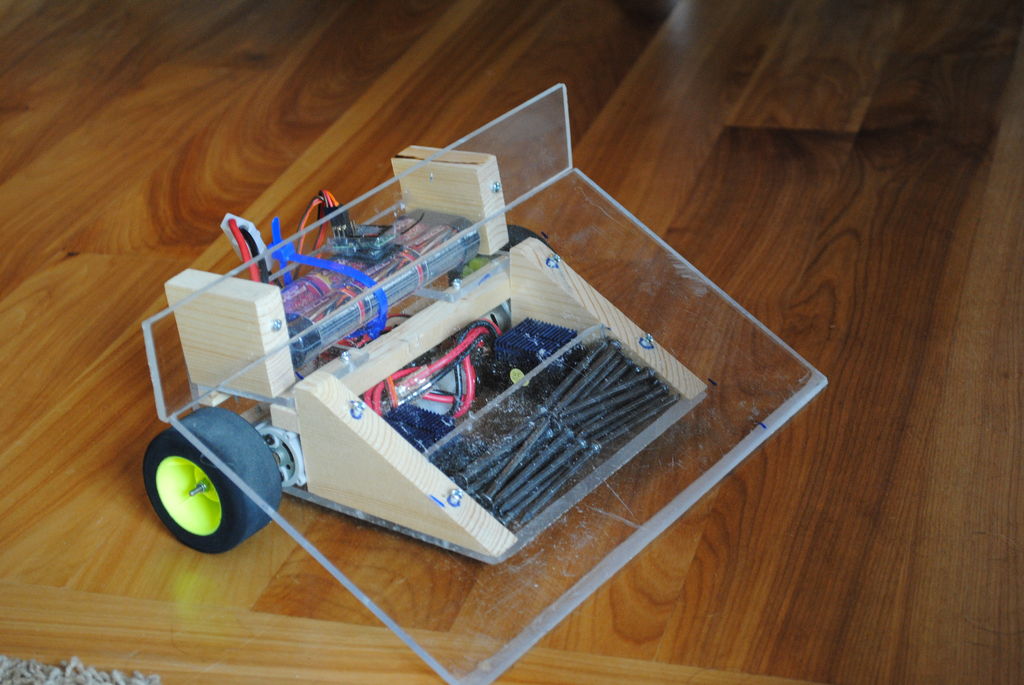
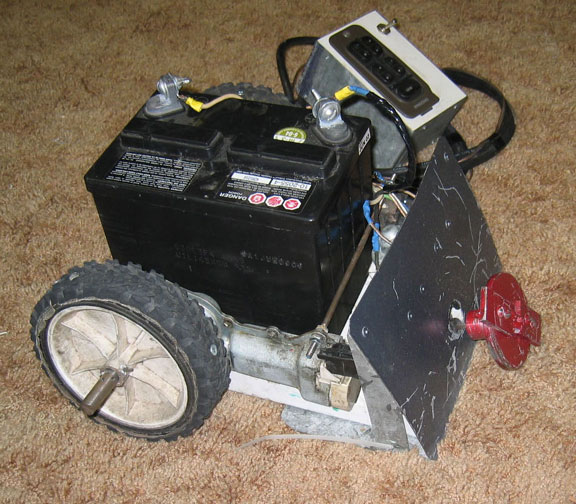
Building the body of your robot!
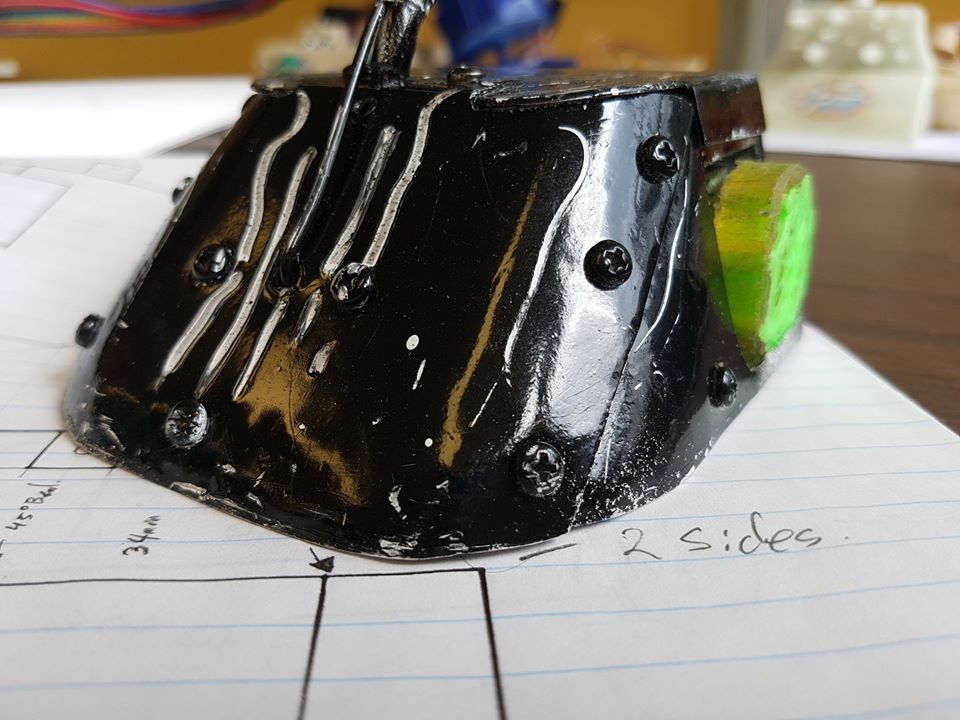
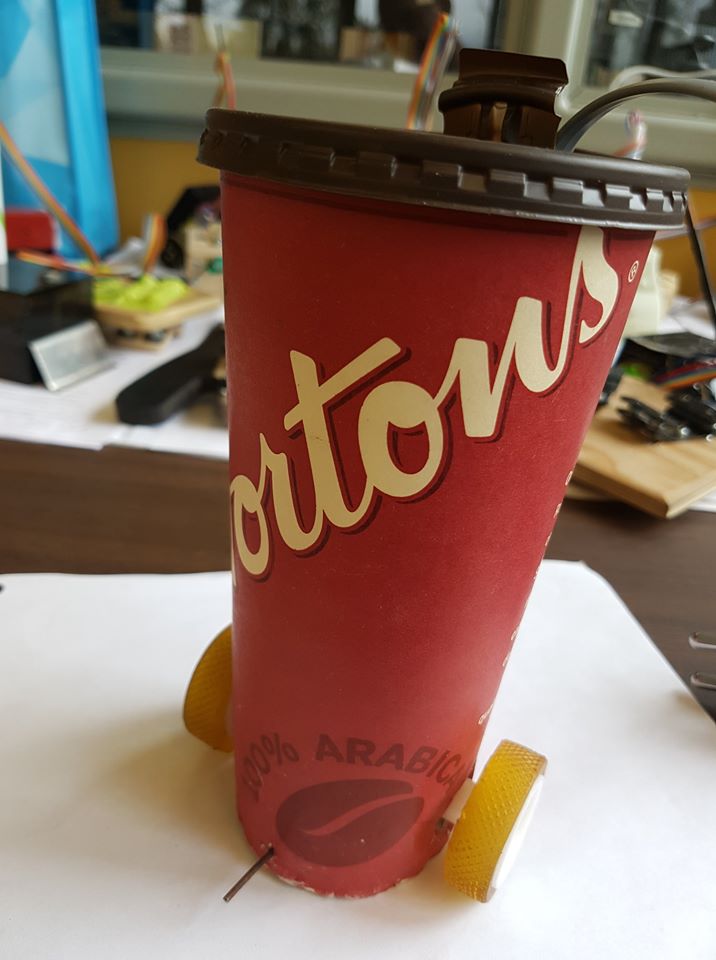
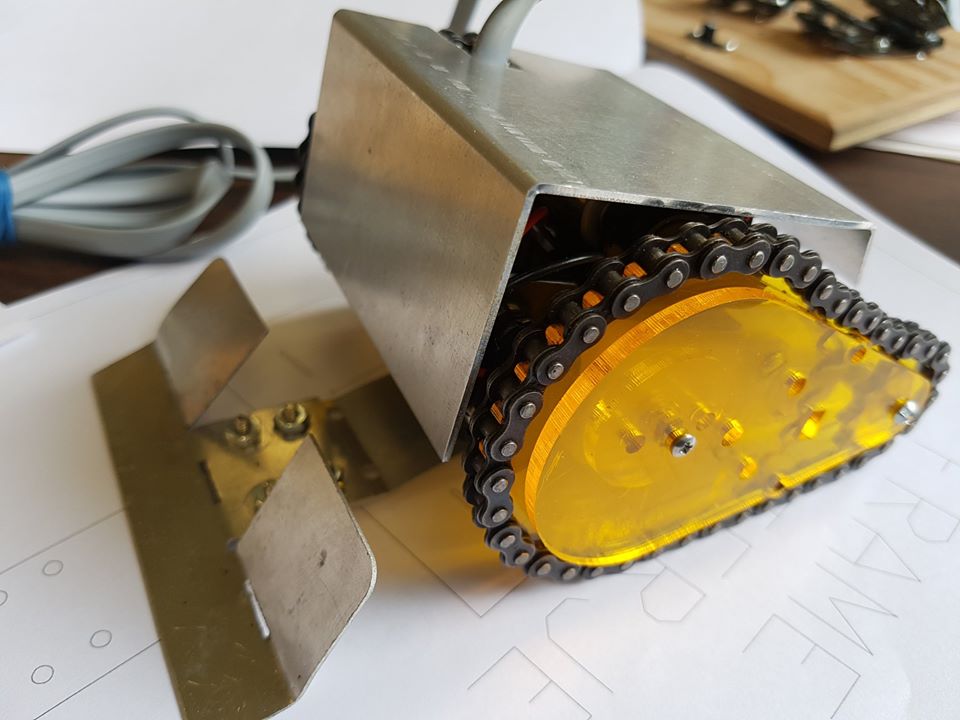
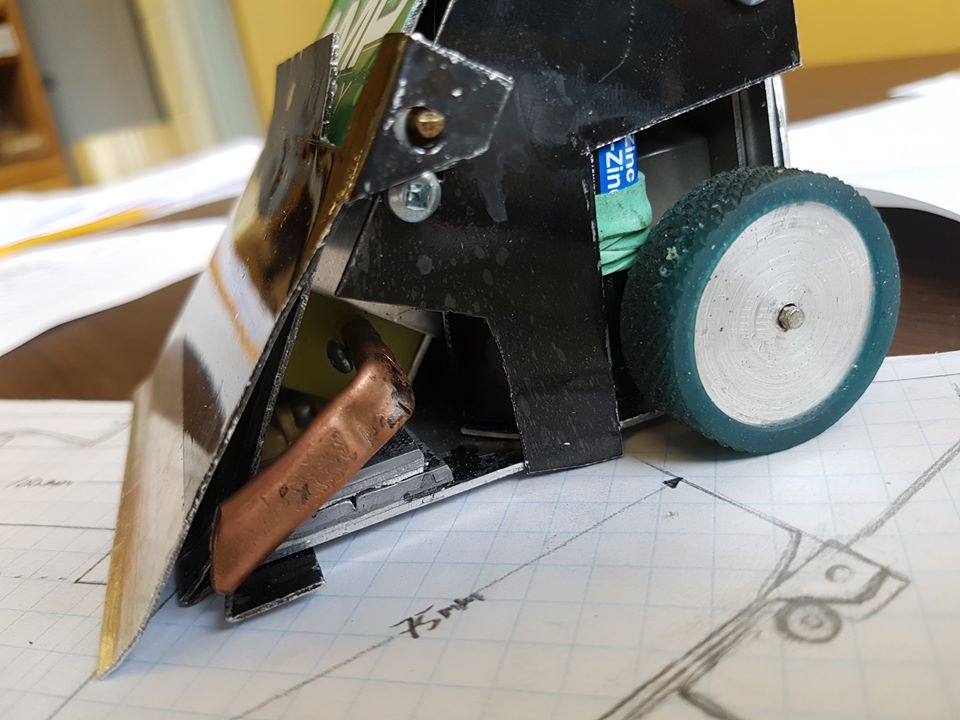
It is encouraged to use more than just the supplied sheet metal for the body construction of your project. Using recycled materials like aluminum popcans instead of steel sheet metal can result in a lighter robot which allows for more parts to be added and still be under the 500gram weight restriction
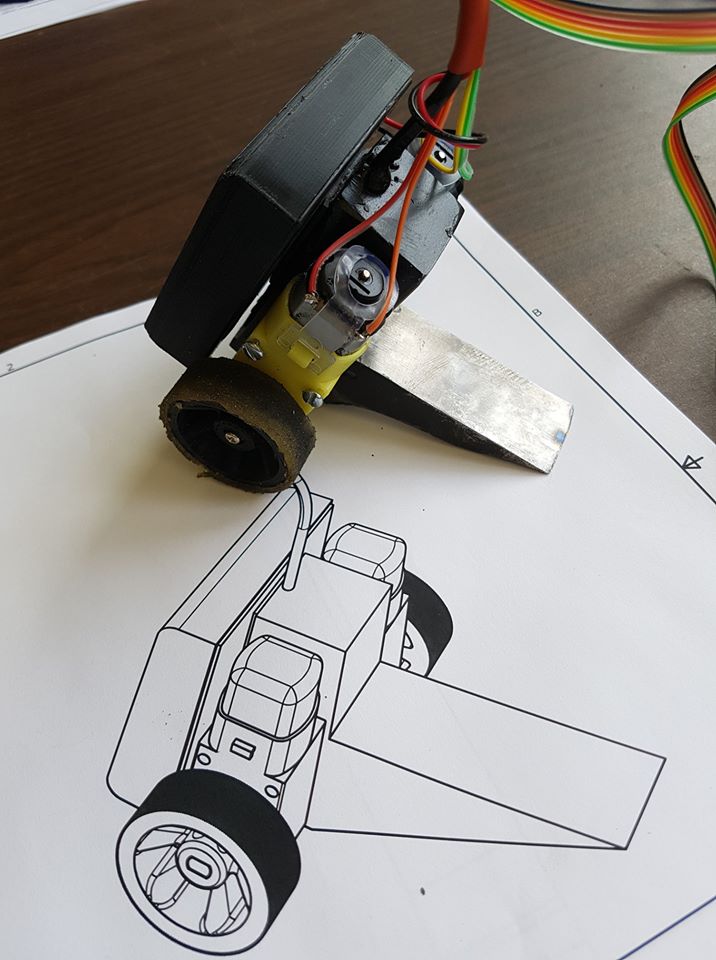
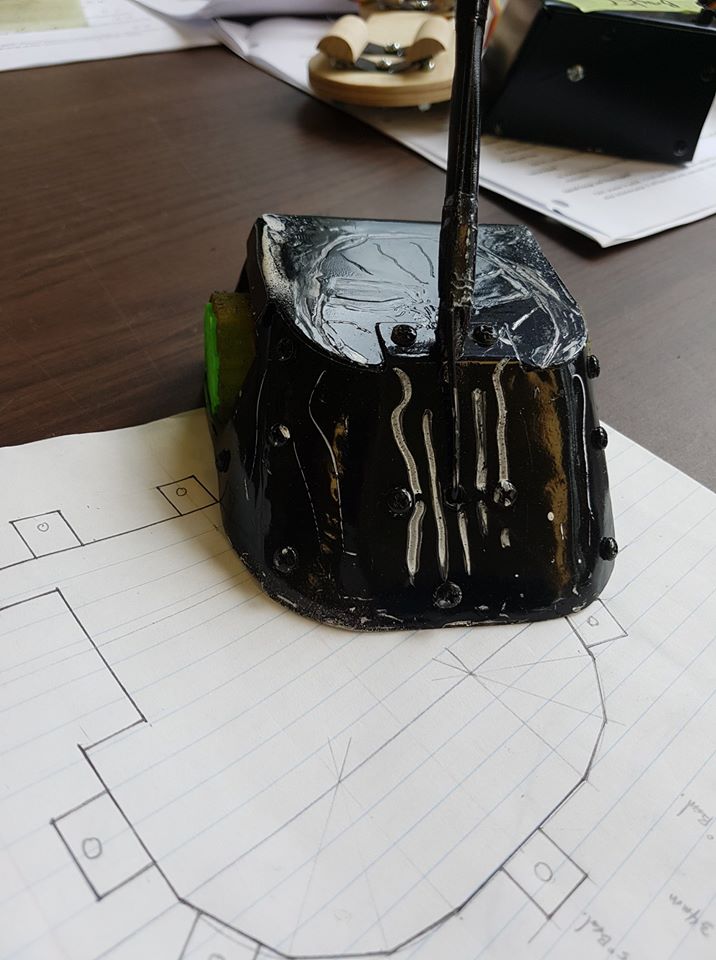
Drawings:
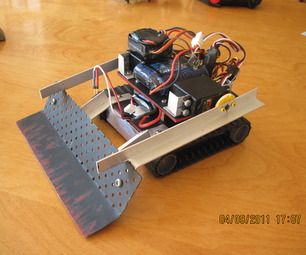
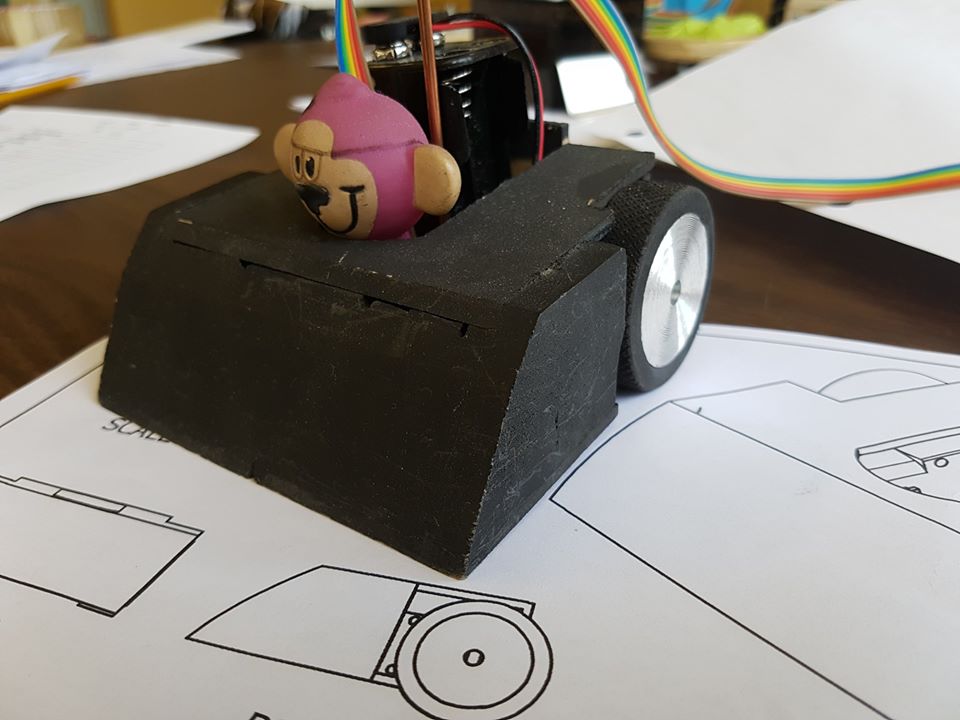
Before you can begin construction of your robot you will need to create a set of orthographic plans for how your robot will look. Start with ideation sketches and then convert those to real useable blueprints. During your ideation you will want to think about your strategy for pushing your opponent out of the ring. Are you going to bulldoze them? Are you going to flip them over? Is your plan to run in circles waiting for your opponent to make a mistake? Plan Plan Plan!
Size: Robots must fit inside a 13x13cm square. Robots will have a height restriction of 20cm and a total weight restriction of 500grams
Robots parts may fold down after official "weigh in" and measurement
Power: During competition robots will be powered by a teacher set power supply for a fair battle.
Robots Speed: Speed of your robot will be determined by the gear ratio you choose and the size of your wheels
Antennae: a "flagpole" style antennae should be used to get your wires up in the air so they do not get tangled during battle
Loopholes and cheating: You cannot tape your robot down to the ring creating a stuck brick. The judge should be able to pick up your robot without it being stuck to the ground
Weapons: While the winner is determined on who is pushed from the ring you are allowed to add some sort of offense to your robot as long as it all fits within the size limit. No fire or things that can cause permanent damage to your opponent
Building the body of your robot!
It is encouraged to use more than just the supplied sheet metal for the body construction of your project. Using recycled materials like aluminum popcans instead of steel sheet metal can result in a lighter robot which allows for more parts to be added and still be under the 500gram weight restriction
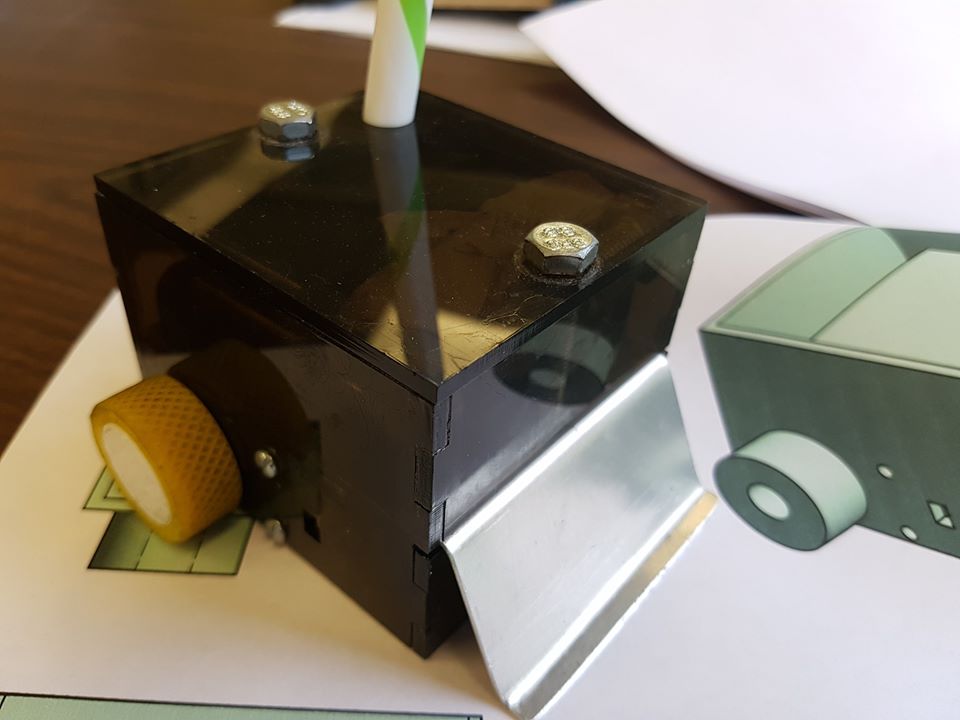
Drawings:
Before you can begin construction of your robot you will need to create a set of orthographic plans for how your robot will look. Start with ideation sketches and then convert those to real useable blueprints. During your ideation you will want to think about your strategy for pushing your opponent out of the ring. Are you going to bulldoze them? Are you going to flip them over? Is your plan to run in circles waiting for your opponent to make a mistake? Plan Plan Plan!
Wiring your controller
There are many ways to construct and wire your sumo bot controller but here is the most simple way to build it out of cheap materials (basically what I will provide you with)
There are many ways to construct and wire your sumo bot controller but here is the most simple way to build it out of cheap materials (basically what I will provide you with)
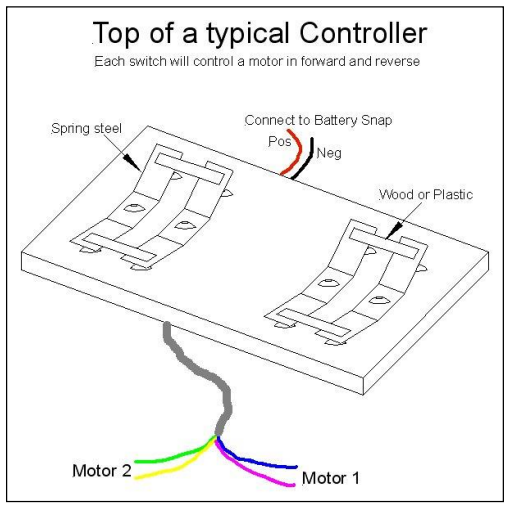
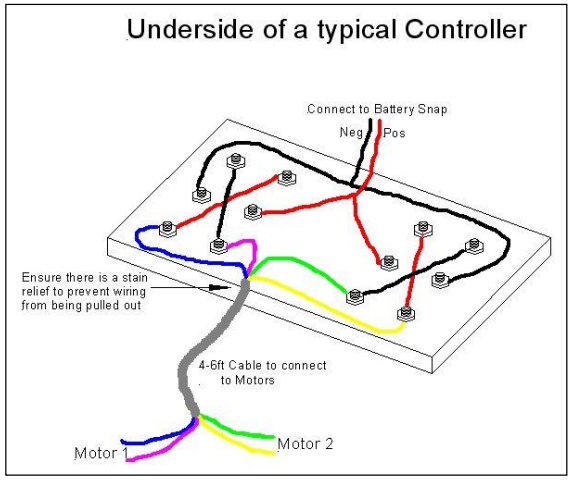

This multitide of wires is what will allow your robot to go both backwards, forwards and make turns. Each motor is controlled independently with 2 'tank sticks' rather than a single wheel and foot pedal like a car. To go forward both motors must go in the same direction forward. To turn left the left motor must either stop or go in reverse while the right motor must go forward. With some practice you will get really good. If you don't practice you will not get really good. Simple right?
Video Courtesy of R. Ryan
Sample Blueprint Download and super smart stuff from another teacher (so much wow)
| sumo_bot_blueprint_package.pdf |
| tethered-mini-sumo_write_up_jason.pdf |
|
|

|
|
|
|
|
|
|
|
|
|
|
|
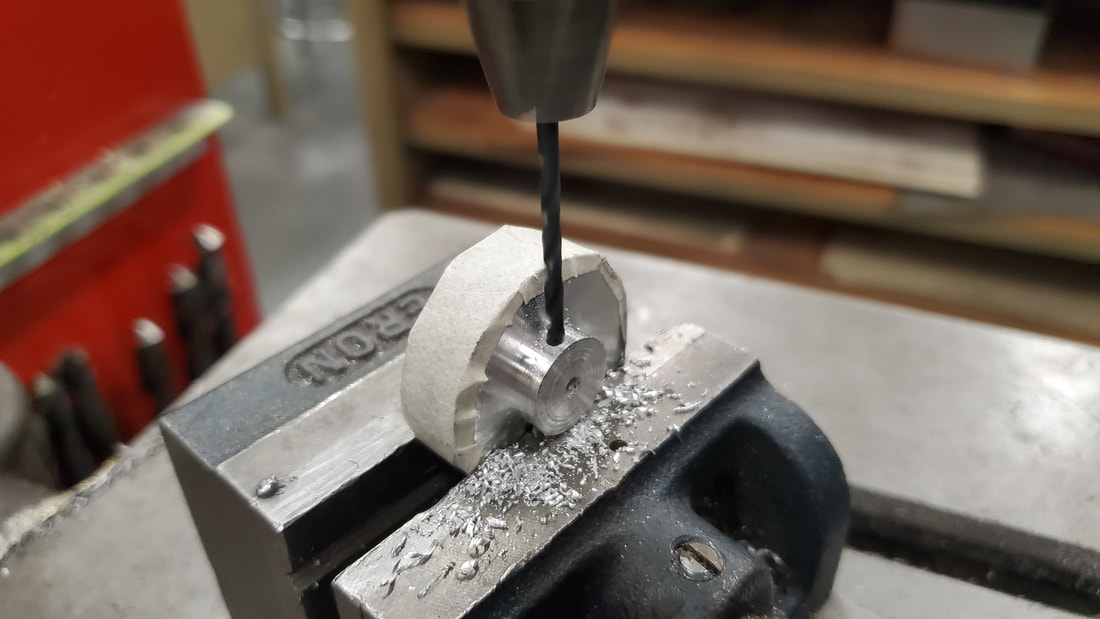
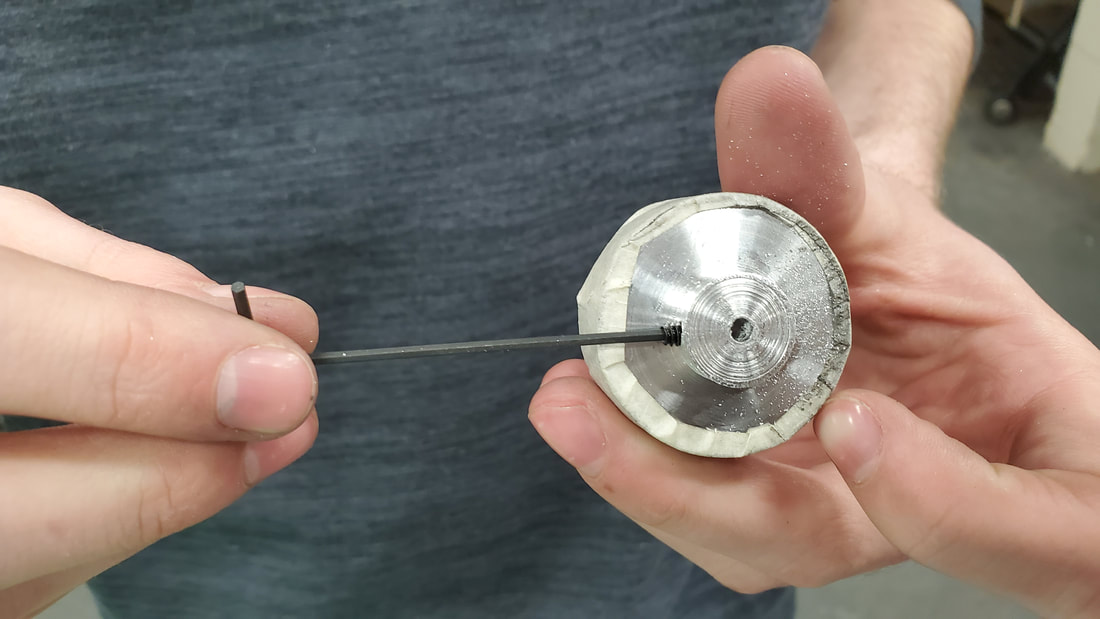
Making Metal wheels
If making wheels on the lathe here is a a way that works especially if adding rubber or some sort of grip to the outside after!
1) Lathe: Face, center drill, and drill an axle hole with a 1/8" drill bit. Make sure to drill a bit deeper than you need!
3) Use a 6-32 tap to create threads inside the hole
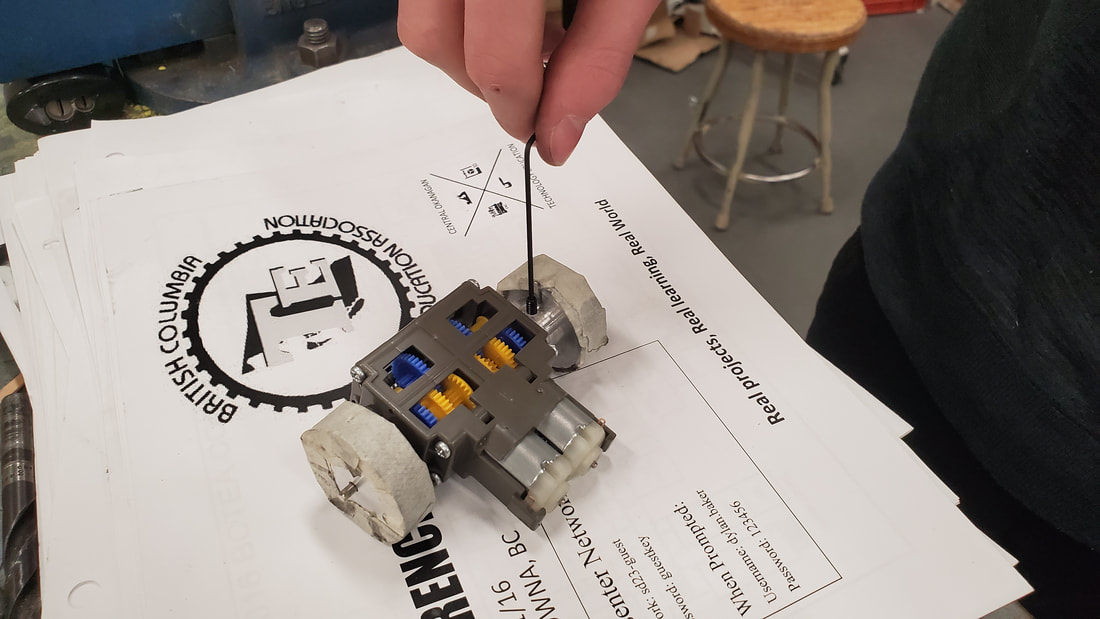
4) Test fit your wheel with a 6-32 set/grub screw
5) Install wheel onto axle and tighten grub screw until snug. DO NOT OVERTIGHTEN as you may strip the thread or break the allen key
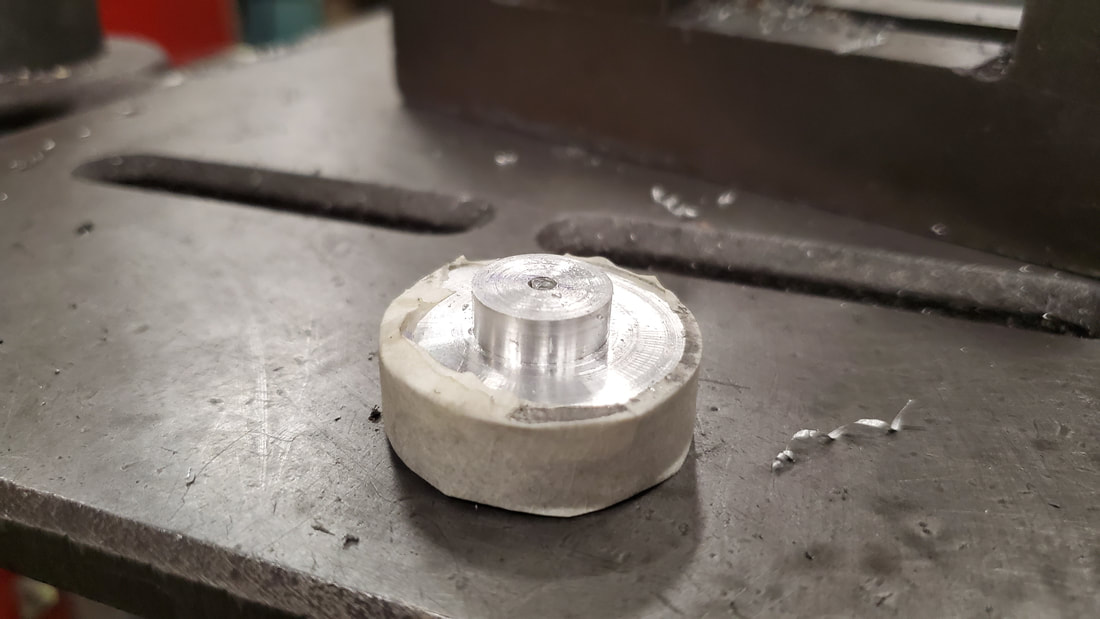
6) success
1) Lathe: Face, center drill, and drill an axle hole with a 1/8" drill bit. Make sure to drill a bit deeper than you need!
- Knurl if needed or at least turn the diameter to the correct size
- Use the parting tool to create the hub diameter as it gives a nice flat finish
- Use the parting tool to cut off your wheel while leaving enough left over material for the next students wheels
3) Use a 6-32 tap to create threads inside the hole
4) Test fit your wheel with a 6-32 set/grub screw
5) Install wheel onto axle and tighten grub screw until snug. DO NOT OVERTIGHTEN as you may strip the thread or break the allen key
6) success
|
|
|
|