Vehicle Sculpture Project
Students who have already completed the previous start of the year projects in previous years will start with the micro welding sculpture project. This means you already understand the concepts and majority of techniques involved with using cutting tools, lathes, welders, milling machine, etc
Design Brief:
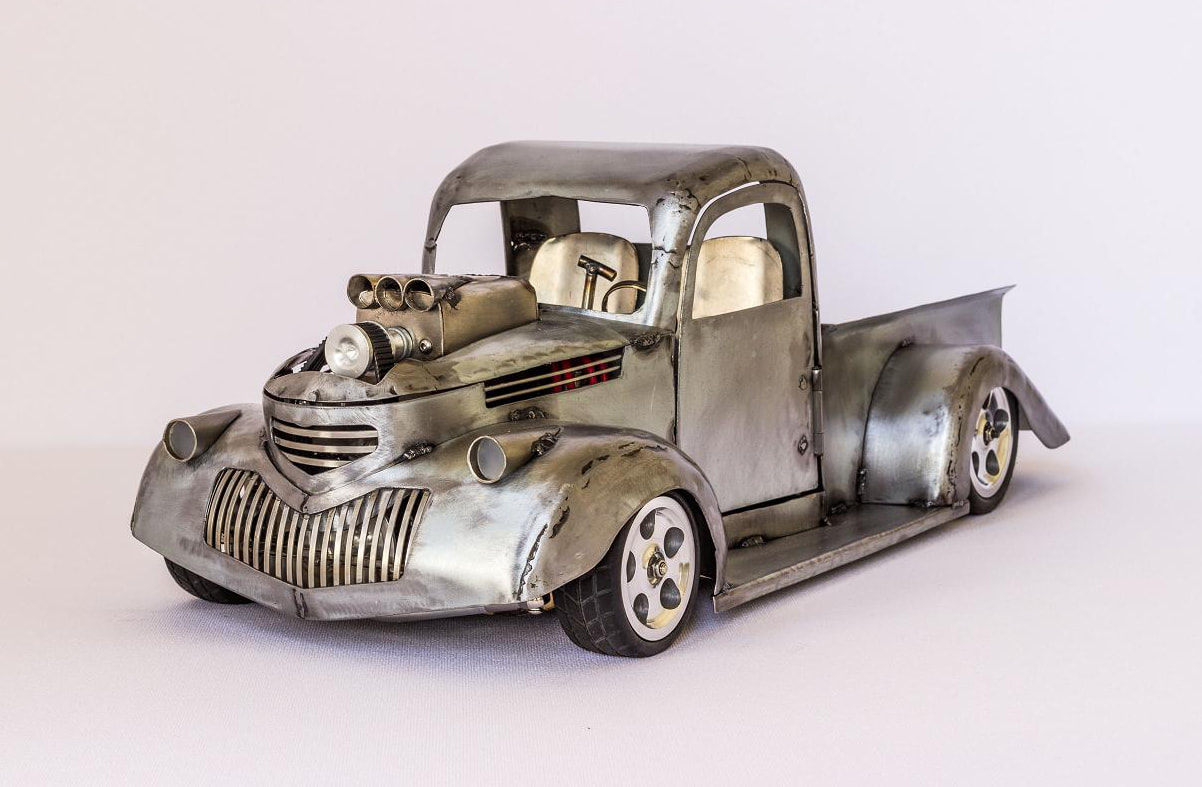
Choose a land or air vehicle you like and begin by drawing a side view. You may source images from the internet to use as a reference. A vehicle (as defined by me) is a mode of transportation or used for work that has at least 2 wheels, a motor, a driver seat/saddle, a frame/body, steering system (does not need to function), exhaust (unless electric). If for air then helicopters, planes, jets, etc. Aim for as many cool parts details as you can!
Example vehicles: Motorcycle/dirtbike, car, mid/full size truck, tractor, all terrain vehicle, camper van, logging truck, etc
Size restrictions:
Minimum wheel base of 4 inches/10 cm.
Max overall length of 12 inches/30 cm for whole project
Material cutting list/planning all your parts:
While you may not have the exact size of each part you should make a list of each main part you will have to create and a rough idea of size. When you begin construction I recommend starting with one part and then building outwards from it. An example of that would be starting with the wheels of a motorcycle and then adding wheels of a certain size, motor, forks, engine, exhaust, etc in that rough order as you build on each part and assemble using a welder and/or fasteners.
You must have your rough idea planned out before you cut any materials.
What material can we use for this project?
I recommend using steel for anything that will be welded together. You can use material from our short ends/recycled
Final Fit and Finish:
It is expected that you put effort into the finishing such as sanding, getting rid of any welding spatter or burs, and some paint if needed.
BONUS!
Can you make your wheels rotate around an axle? Can you make your steering function (front wheels can turn left and right
Tricky pieces?
Can’t figure out how to shape a certain part because the original metal isn’t the same shape? Weld stuff together and then cut, grind or file it to your desired shape.
This senior level project is meant to take at least 20 hours of class time with welding and finishing touches as a major focus. You are welcome to use any tools in the shop that you think will help you accomplish this goal.
Planning:
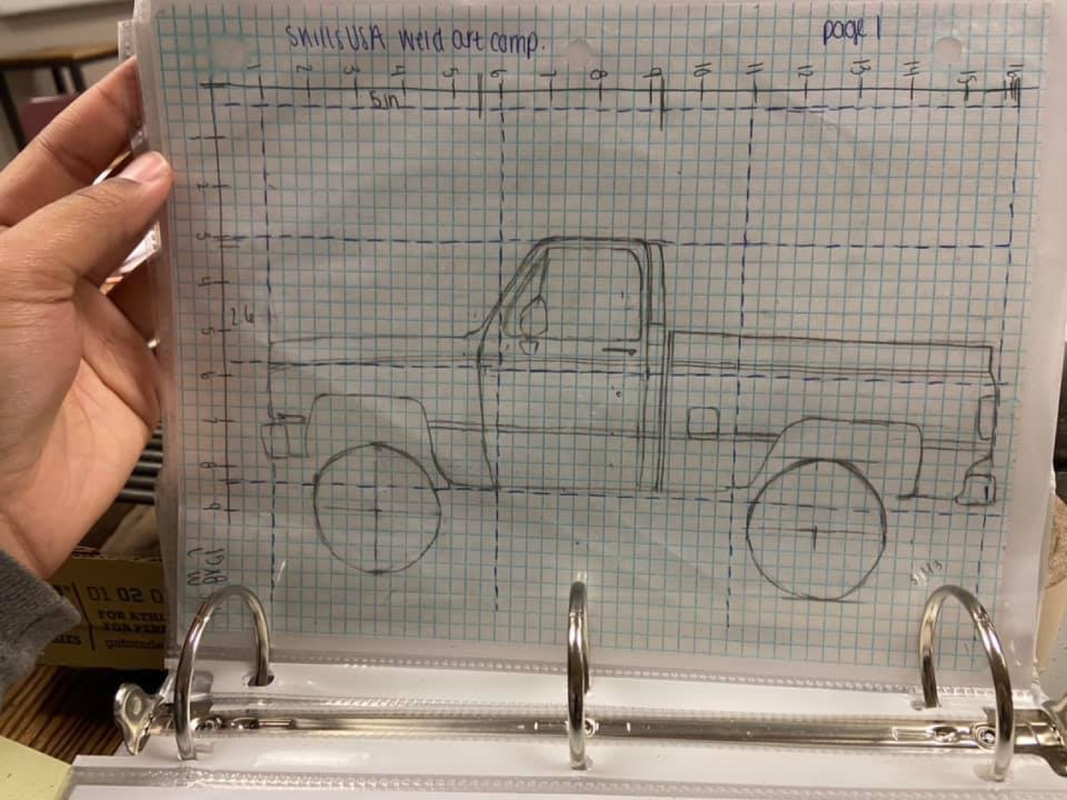
Cutting List – Do you best to list or at least draw the amount of parts you plan on using and what materials you have gathered. Minimum 20 individual pieces but many of you may end up with over 50 parts that look nothing like your original raw materials!
Attach all drawings and ideas to this planning booklet as you draw our your ideas. If you need grid/graphing paper please ask or bring your own!
Design Brief:
Choose a land or air vehicle you like and begin by drawing a side view. You may source images from the internet to use as a reference. A vehicle (as defined by me) is a mode of transportation or used for work that has at least 2 wheels, a motor, a driver seat/saddle, a frame/body, steering system (does not need to function), exhaust (unless electric). If for air then helicopters, planes, jets, etc. Aim for as many cool parts details as you can!
Example vehicles: Motorcycle/dirtbike, car, mid/full size truck, tractor, all terrain vehicle, camper van, logging truck, etc
Size restrictions:
Minimum wheel base of 4 inches/10 cm.
Max overall length of 12 inches/30 cm for whole project
Material cutting list/planning all your parts:
While you may not have the exact size of each part you should make a list of each main part you will have to create and a rough idea of size. When you begin construction I recommend starting with one part and then building outwards from it. An example of that would be starting with the wheels of a motorcycle and then adding wheels of a certain size, motor, forks, engine, exhaust, etc in that rough order as you build on each part and assemble using a welder and/or fasteners.
You must have your rough idea planned out before you cut any materials.
What material can we use for this project?
I recommend using steel for anything that will be welded together. You can use material from our short ends/recycled
Final Fit and Finish:
It is expected that you put effort into the finishing such as sanding, getting rid of any welding spatter or burs, and some paint if needed.
BONUS!
Can you make your wheels rotate around an axle? Can you make your steering function (front wheels can turn left and right
Tricky pieces?
Can’t figure out how to shape a certain part because the original metal isn’t the same shape? Weld stuff together and then cut, grind or file it to your desired shape.
This senior level project is meant to take at least 20 hours of class time with welding and finishing touches as a major focus. You are welcome to use any tools in the shop that you think will help you accomplish this goal.
Planning:
Cutting List – Do you best to list or at least draw the amount of parts you plan on using and what materials you have gathered. Minimum 20 individual pieces but many of you may end up with over 50 parts that look nothing like your original raw materials!
Attach all drawings and ideas to this planning booklet as you draw our your ideas. If you need grid/graphing paper please ask or bring your own!
|
Vehicle Sculpture Ideas:
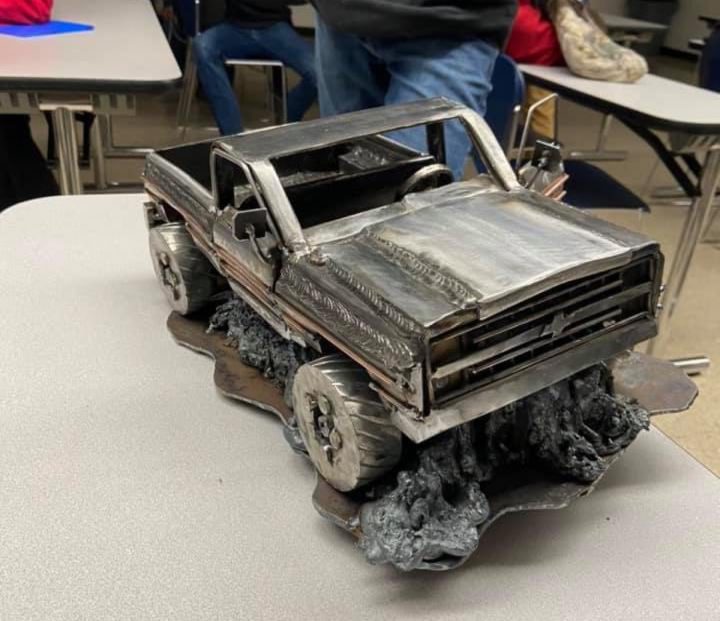
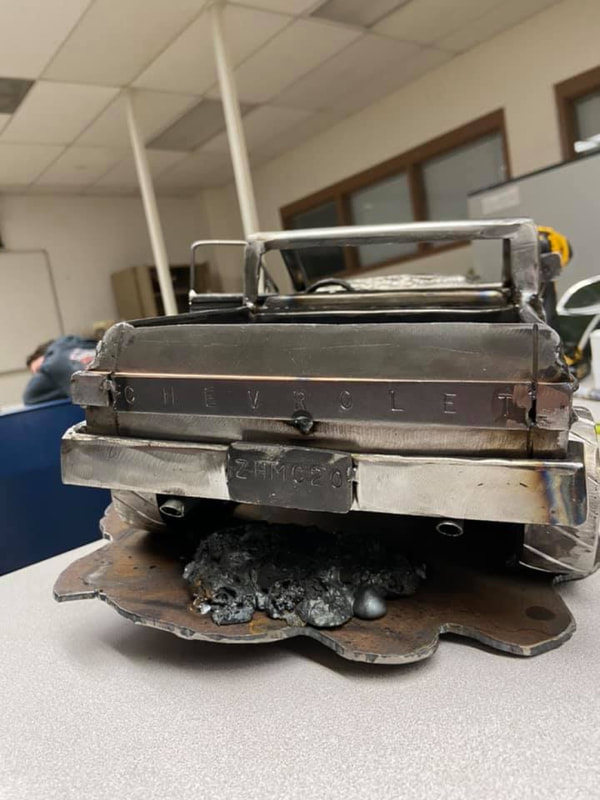
An absolute beast of a project: See Image This Chevy truck shown is an advanced level 3 project made by Zahrah Hayden, who says she devoted nearly 100 hours to make it. See the link to the story and planning behind this wicked metal project! https://gmauthority.com/blog/2020/03/student-creates-awesome-chevrolet-truck-sculpture-from-scrap-metal/ |
|
|
|
|
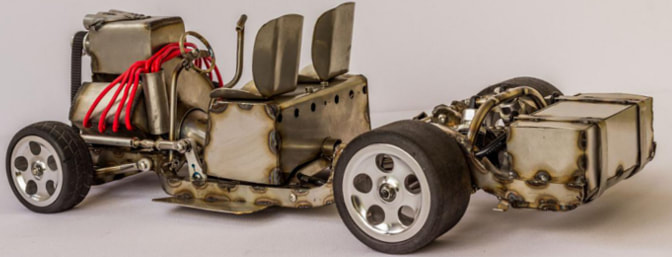
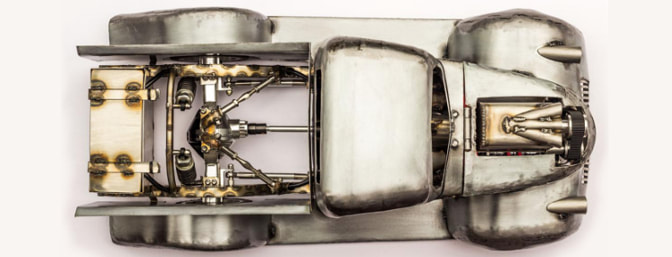
Next level RC vehicle build:
Check out the article showing the amazing amount of work put in by Byron Townsend in Australia https://www.rcgroups.com/forums/showthread.php?2170843-Must-see-%C2%97-Scratch-Built-Metal-Masterpiece |
|
|
|
See PDF Link below for student handout and planning sheet
| sculpture_vehiceles_level_3_metal_handout.pdf |
