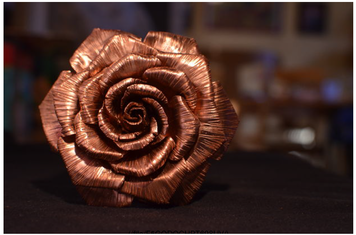
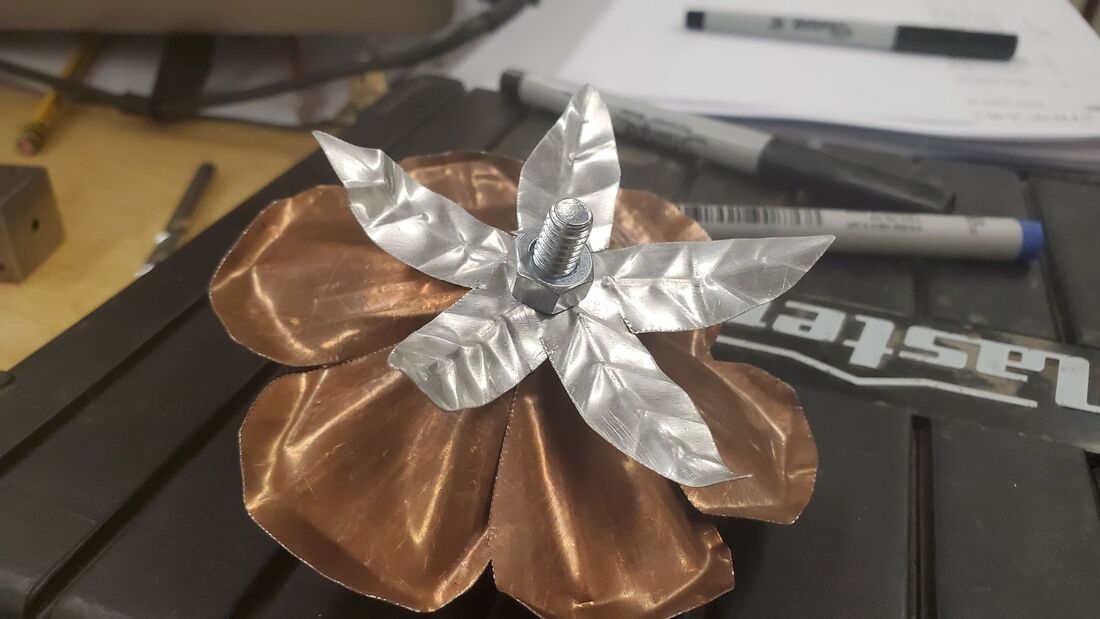
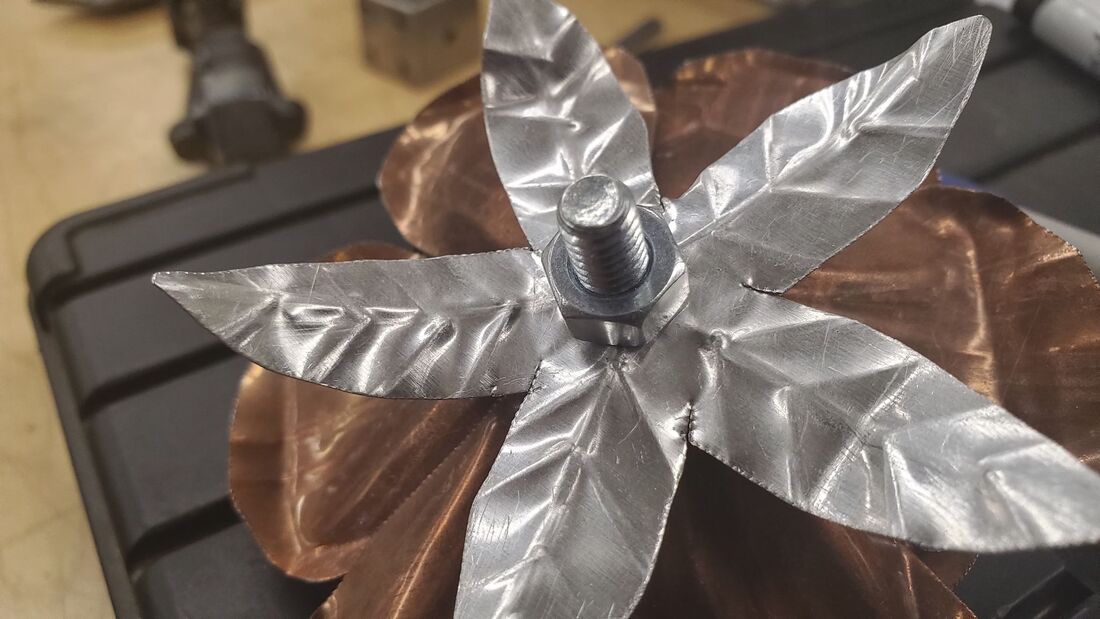
Grade 8 Metal Rose
|

|
credit to https://www.instructables.com/id/Copper-Rose/ for this great project
Design:
The simple rose project is a good introduction project to layout and using tools. We will be making our own templates to learn the process and develop and practice more skills.
Tools: (there will probably be more...)
Calipers - for drawing circles or arcs on paper or on material
Center punch - used with a hammer and makes a dent in metal before drilling holes
Rule/ruler/straight edge - for measuring distance
Tin snips or aviation snips - cutting sheet metal up to 20 gauge thick
Beverly Shear - cutting sheet metal and some other materials. No round materials!
Hack Saw - cutting solid material held securely by a vice or clamp
Drill press - Puts holes in things and removes loose objects like hair and clothing. Watch out!
Procedure:
1) Blank paper time. Use the hole punch to save your drawing if you don't finish during class time.
2) Layout the 6 shapes according to the class demonstration. We want them to fit on the paper to make our own templates which we will transfer onto the metal. We do this to plan and prevent wasting sheet metal. Extra sheet metal means more for other projects!
-To get nice circles use a caliper with a pencil taped on one "leg" if you don't have a geometery set. Use this to draw out the circles to the correct diameter.
-DO NOT CUT OUT YOUR SHAPES UNTIL YOU HAVE GOTTEN TEACHER APPROVAL. YOU GET MARKS FOR YOUR LAYOUT
3) Use the circles to create your petals and other flower parts. Draw them close to my samples but you can get creative with some of the shapes. Take your time!
4) Once you have received your mark you may cut out your shapes. Put your name on each piece so they don't go missing or get mixed up.
5) Use a felt pen or a dark sharpie (I like blue or black) to trace the templates onto your sheet metal as shown in the demo
-Before your start tracing you should layout your paper templates with enough spacing to get your aviation snips around easily. DO NOT CRAM THEM TOO CLOSE TOGETHER. 2cm spacing minimum unless you are a really sneaky cutter. Imagine the "pathway" your snips should go so place your templates on your sheet metal with that in mind
- GROUP HINT: cut strips of sheet metal at the width of your pieces and add 0.5cm to allow for "wiggle room". Share the strip of sheet metal with others and trace your templates
to be continued....
Big ideas and tips:
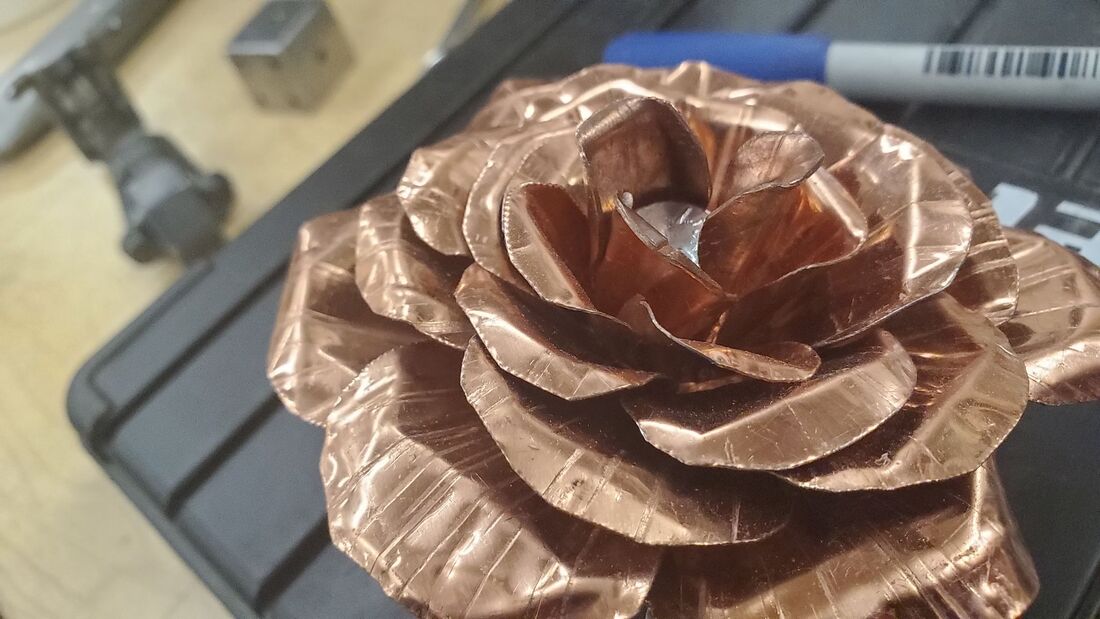
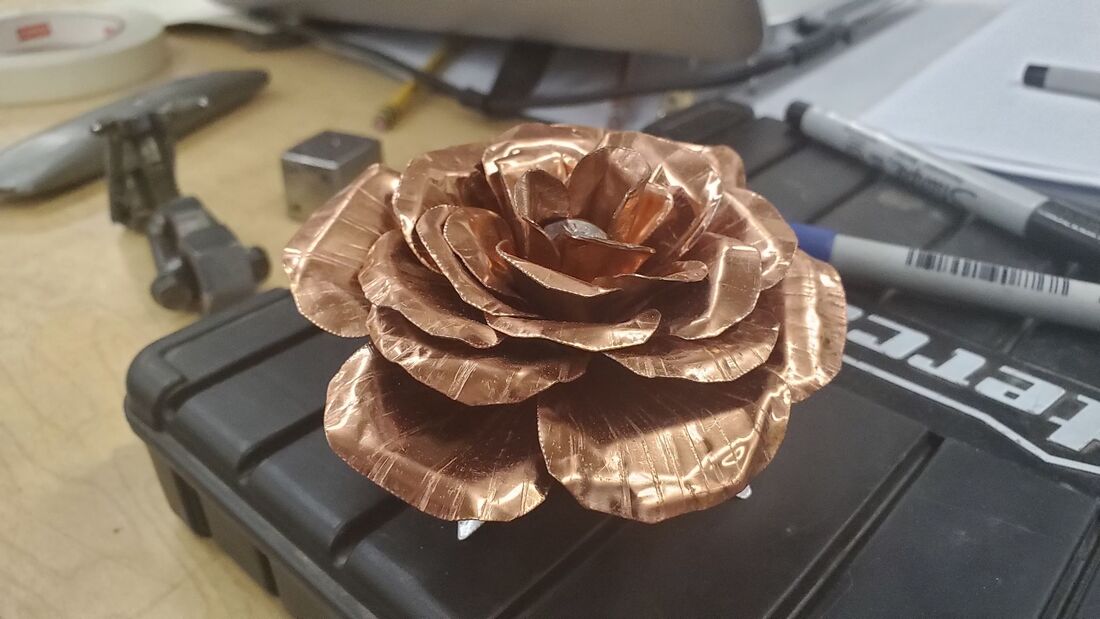
Your pieces should get net permanently attached or welded together until as much sanding as possible has been done. This will be difficult to do once the flower pieces are tight together.
1) Blank paper time. Use the hole punch to save your drawing if you don't finish during class time.
2) Layout the 6 shapes according to the class demonstration. We want them to fit on the paper to make our own templates which we will transfer onto the metal. We do this to plan and prevent wasting sheet metal. Extra sheet metal means more for other projects!
-To get nice circles use a caliper with a pencil taped on one "leg" if you don't have a geometery set. Use this to draw out the circles to the correct diameter.
-DO NOT CUT OUT YOUR SHAPES UNTIL YOU HAVE GOTTEN TEACHER APPROVAL. YOU GET MARKS FOR YOUR LAYOUT
3) Use the circles to create your petals and other flower parts. Draw them close to my samples but you can get creative with some of the shapes. Take your time!
4) Once you have received your mark you may cut out your shapes. Put your name on each piece so they don't go missing or get mixed up.
5) Use a felt pen or a dark sharpie (I like blue or black) to trace the templates onto your sheet metal as shown in the demo
-Before your start tracing you should layout your paper templates with enough spacing to get your aviation snips around easily. DO NOT CRAM THEM TOO CLOSE TOGETHER. 2cm spacing minimum unless you are a really sneaky cutter. Imagine the "pathway" your snips should go so place your templates on your sheet metal with that in mind
- GROUP HINT: cut strips of sheet metal at the width of your pieces and add 0.5cm to allow for "wiggle room". Share the strip of sheet metal with others and trace your templates
to be continued....
Big ideas and tips:
Your pieces should get net permanently attached or welded together until as much sanding as possible has been done. This will be difficult to do once the flower pieces are tight together.
Original templates from VBOW:
https://www.instructables.com/Copper-Rose/
He has a PDF download available there
https://www.instructables.com/Copper-Rose/
He has a PDF download available there
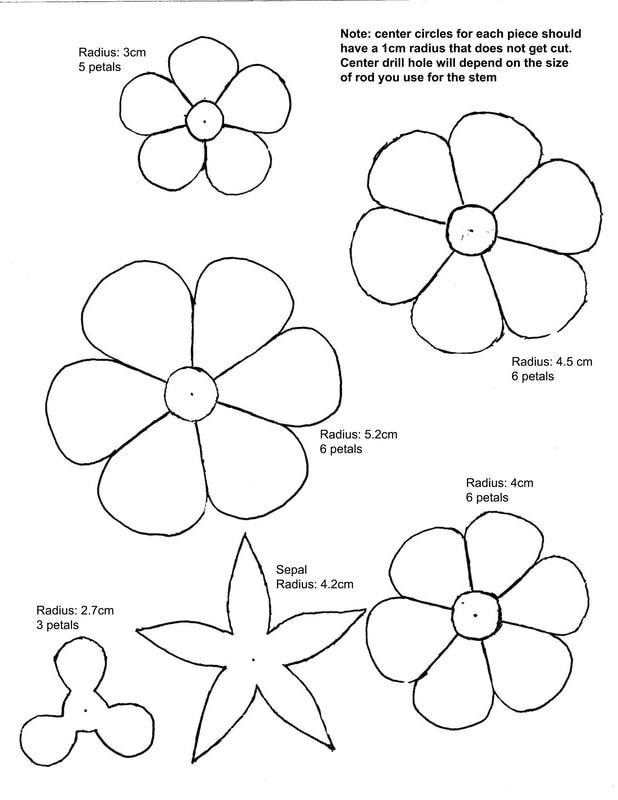
What some of your shapes could look like:
|
|
|
|
| scrap_metal_rose_marking_sheet.pdf |
