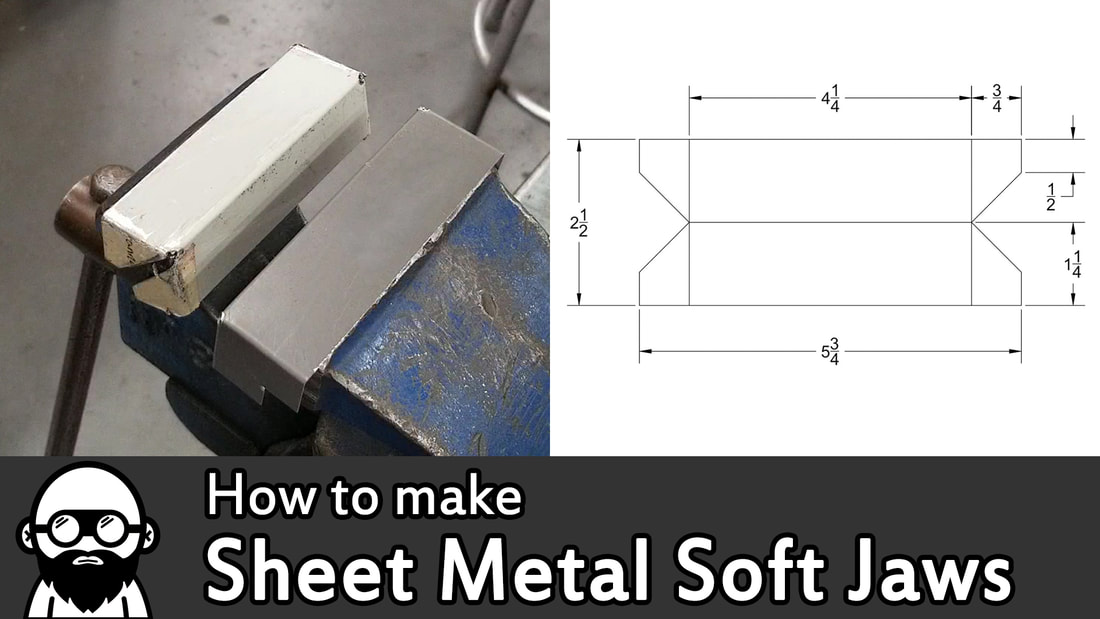
Sheet Metal Soft Jaws
|

|
Bored in the class? Finished all your projects? Sick of the bench vice putting scratches into your projects? Have I got the solution for you!! 9 out of 10 doctors recommend making a set of soft jaws will fulfill your life more than you thought possible.
Steps - See instructional video for complete directions for the how to use tools/machines to complete this simple sheet metal project
Material Needed: Sheet metal 5.75" x 2.5" (2 pieces if you are making a set). The video shows using 24 gauge thick sheet metal.
1) Cut out sheet metal to size (5.75" x 2.5") on the foot shear.
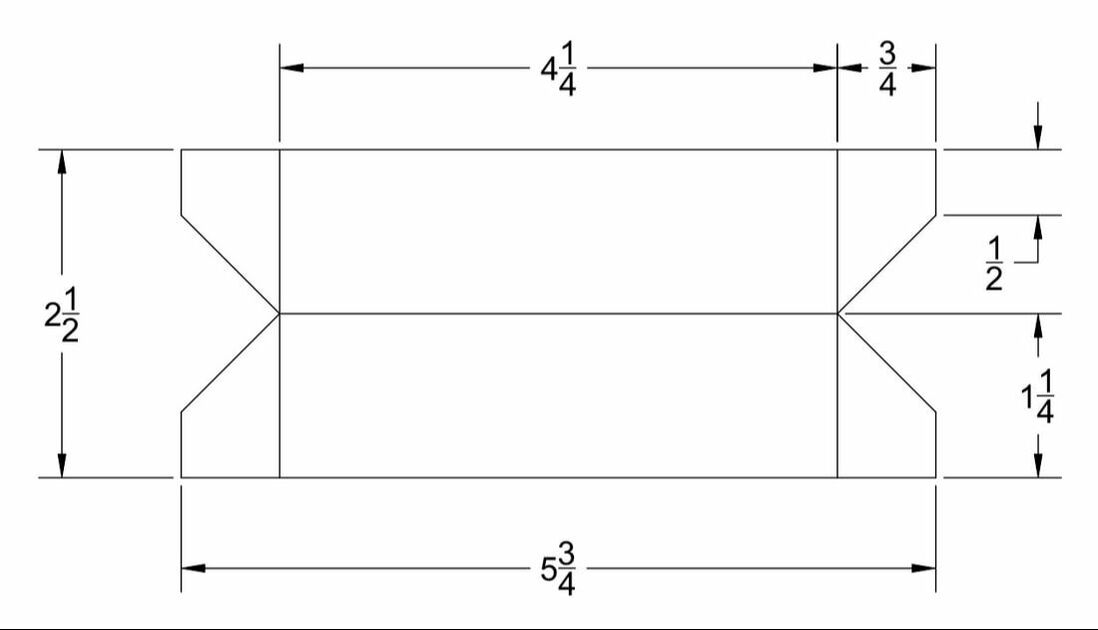
2) Layout lines on your metal to match the drawings. You should use a scribe to 'scratch' the lines for the most accurate layout.
3) Punch small holes (1/8') on the whitney punch where the angles meet
4) Cut angles using tin snips or aviation snips
5) File edges or burs so there are no sharp edges
6) Set up the Di-Acro Finger Brake for bending
7) Bend tabs at 90 degrees first
8) Bend center line 90 degrees
Material Needed: Sheet metal 5.75" x 2.5" (2 pieces if you are making a set). The video shows using 24 gauge thick sheet metal.
1) Cut out sheet metal to size (5.75" x 2.5") on the foot shear.
2) Layout lines on your metal to match the drawings. You should use a scribe to 'scratch' the lines for the most accurate layout.
3) Punch small holes (1/8') on the whitney punch where the angles meet
4) Cut angles using tin snips or aviation snips
5) File edges or burs so there are no sharp edges
6) Set up the Di-Acro Finger Brake for bending
- use the 3" and 1 1/4" fingers together to create a 4 1/4" wide finger (See demo for installation)
7) Bend tabs at 90 degrees first
8) Bend center line 90 degrees
Find specific parts of the video!
1:01 Layout tools
2:52 Foot shear demo
- you can also use the table scale measurements to do your cut without any layout marks on the material. I teach to draw all layout lines and double check that the cutting blade and table edge lines up visually since our machine isn't as accurate as it used to be. You see me showing this in more detail at 3:50
4:30 meant to say foot shear instead of beverly shear. Whoops!
4:42 Cad Drawing!
5:13 Layout for the actual Soft Jaws
6:62 seriously go check out Canadian Band "Metric" https://youtu.be/cEsr5Mm3JfE
7:19 Whitney Punch demo
8:28 That was easy https://youtu.be/3YmMNpbFjp0
9:06 End the stigma. We all learn differently. http://www.healthgoesup.com/articles/9916/1/difference-add-adhd-1.html
9:26 Setup and using the Di-Acro Finger Brake
11:35 accidentally on purpose
11:48 How animals eat their food https://youtu.be/qnydFmqHuVo
12:51 how the soft jaws fit our bench vice
12:57 Not 'Soft' Jaws https://youtu.be/2MdAw_f5pAU
| soft_jaws_Holbrook_blueprint.pdf |
| soft_jaws_Holbrook.dwg |
| bench_vice_soft_jaws_student printout.pdf |
