Tap and Die 101
|
|
This project introduces the basics of using a Tap and Die set.
| tap_and_die_101.pdf |
Procedure - the above PDF file has images to help with the procedure
Tools:
¼" NC 20 Tap and Die
Metal Lathe
Drill Press
Layout tools (digital caliper, ruler, scribe, square)
Hacksaw and Bandsaw
Letter Punches
Rectangle Metal Piece
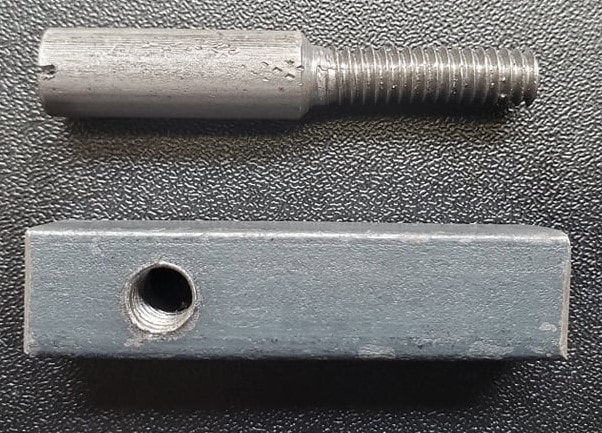
1) Cut a piece of ½ x ½” Solid Square stock 2” long. Use Bandsaw or Hacksaw.
2) Chamfer both ends with a file or bench grinder to get rid of the sharp edges. Use a digital caliper to measure to EXACTLY 2.000” long.
3) Layout a center punch ½” (0.500”) from one end using the digital caliper in the center of the piece
4) Drill hole with a 7/32” Drill bit using the drill press. Make sure your piece is flat in the drill press vice to prevent a crooked hole.
5) Tap with a ½” NC 20 tap. Use lubricant/cutting fluid. Start slow to ensure a straight thread.
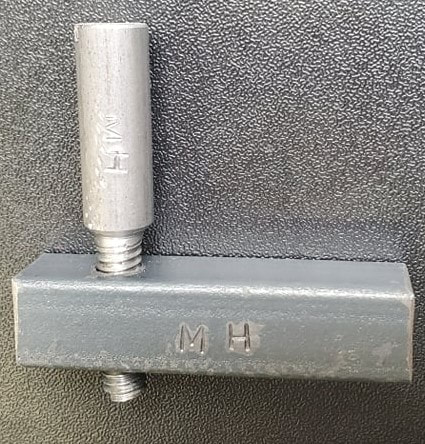
6) Use the letter punches to put your initials on the side of the piece to prove it is yours.
Round Metal Piece/Bolt
1) Cut a piece of 3/8” solid round stock slightly longer than 2” long
2) Face both ends on the metal lathe until EXACTLY 2.000” long. Use the digital calipers to check.
3) Mark the middle of the piece at 1” long and hold in the lathe with enough sticking out as shown in demo. Install the turning bit for the next step.
4) Turn to ¼” (0.250”) diameter. Do not accidently go smaller than 0.240” diameter as we will be using a die on it to add threads. Use the digital caliper to measure and check often so you do not go smaller. I turn the cross-slide handle no more than 5-10 lines at a time. Once you get to 0.260” go extremely slow with your final passes. You can also use a lathe file to file down to exact size. Be careful not to press to hard or the thin piece will bend or fall out of the lathe.
5)Use ¼ NC 20 die to add threads. Use lubricant/cutting fluid
6) Use Hacksaw to cut groove for a flat head screwdriver and use Letter Punches to add your initials to your newly made bolt.
7) Clean threads and test fit the pieces you have created.
¼" NC 20 Tap and Die
Metal Lathe
Drill Press
Layout tools (digital caliper, ruler, scribe, square)
Hacksaw and Bandsaw
Letter Punches
Rectangle Metal Piece
1) Cut a piece of ½ x ½” Solid Square stock 2” long. Use Bandsaw or Hacksaw.
2) Chamfer both ends with a file or bench grinder to get rid of the sharp edges. Use a digital caliper to measure to EXACTLY 2.000” long.
3) Layout a center punch ½” (0.500”) from one end using the digital caliper in the center of the piece
4) Drill hole with a 7/32” Drill bit using the drill press. Make sure your piece is flat in the drill press vice to prevent a crooked hole.
5) Tap with a ½” NC 20 tap. Use lubricant/cutting fluid. Start slow to ensure a straight thread.
6) Use the letter punches to put your initials on the side of the piece to prove it is yours.
Round Metal Piece/Bolt
1) Cut a piece of 3/8” solid round stock slightly longer than 2” long
2) Face both ends on the metal lathe until EXACTLY 2.000” long. Use the digital calipers to check.
3) Mark the middle of the piece at 1” long and hold in the lathe with enough sticking out as shown in demo. Install the turning bit for the next step.
4) Turn to ¼” (0.250”) diameter. Do not accidently go smaller than 0.240” diameter as we will be using a die on it to add threads. Use the digital caliper to measure and check often so you do not go smaller. I turn the cross-slide handle no more than 5-10 lines at a time. Once you get to 0.260” go extremely slow with your final passes. You can also use a lathe file to file down to exact size. Be careful not to press to hard or the thin piece will bend or fall out of the lathe.
5)Use ¼ NC 20 die to add threads. Use lubricant/cutting fluid
6) Use Hacksaw to cut groove for a flat head screwdriver and use Letter Punches to add your initials to your newly made bolt.
7) Clean threads and test fit the pieces you have created.
