Can Punch/Bottle Opener - Intro to Metalwork Project
| can_punch_and_bottle_opener_project_updated.pdf |
This "old-school' project is handy to keep in a backpack when hiking or camping if you ever need to open a can or open a bottle!
Follow along with the in class demos and procedure sheet. Watch the video if you need a reminder for parts of the demonstrations. The video is not meant to be a replacement for proper safety techniques and is only meant as a supplement.
Follow along with the in class demos and procedure sheet. Watch the video if you need a reminder for parts of the demonstrations. The video is not meant to be a replacement for proper safety techniques and is only meant as a supplement.
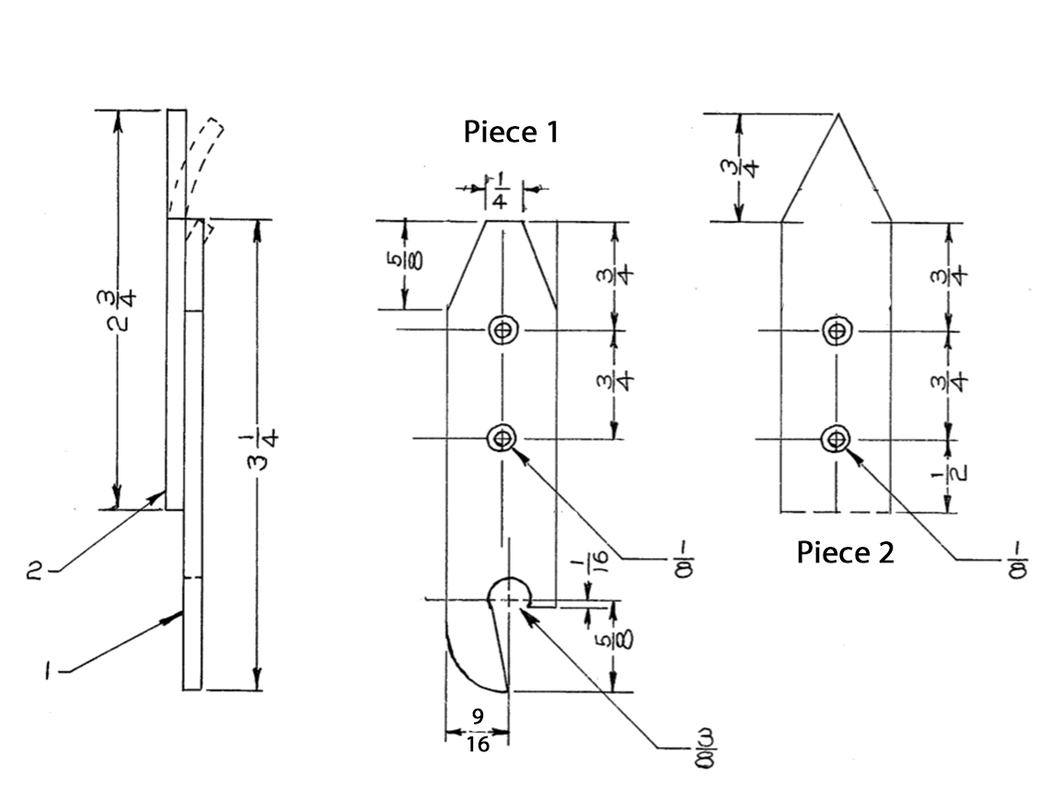
Material: One piece of 6” of 1/8” thick Band Iron. Two 1/8” rivets
Width can be either ¾” wide or 1” wide as long as measurements are done from the center line
Procedure:
Width can be either ¾” wide or 1” wide as long as measurements are done from the center line
Procedure:
- Cut piece of 1/8 x ¾ (or 1”) x 6 ½ band iron. (ALL MEASUREMENTS IN IMPERIAL)
- Measure and cut parts 1 & 2 (1 piece 2 ¾ long and 1 piece 3 ¼ long).
- File ends square and draw file scale off faces and edges of both pieces.
- Layout both pieces with above measurements and have checked by the teacher.
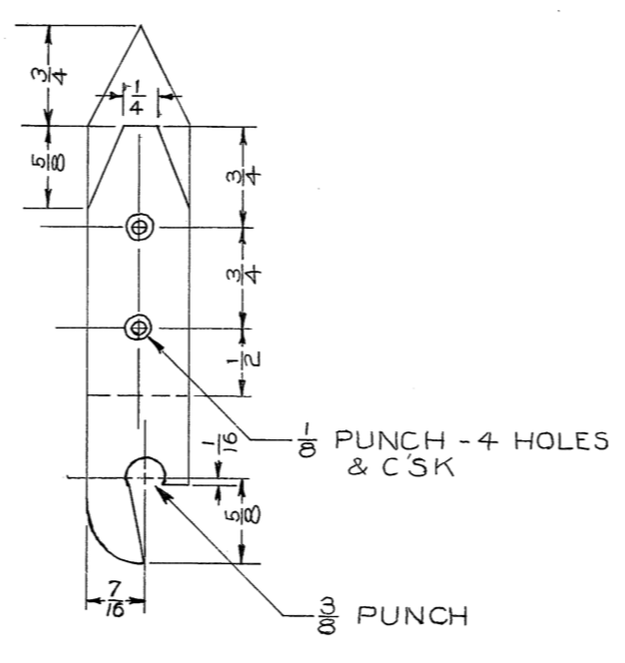
- Center punch the 5-hole locations.
- Piece number 2 drill both at 1/8”
- Piece number 1 drill top hole 1/8 and bottom hole 3/8. Do not drill middle hole!
- Piece number 1 counter sink top hole to match drawing (ask for help).
- Saw and file ends to shape for both pieces. Get help with layout and cutting/grinding techniques so you don’t have to start over.
- Bend offset on piece 1 and curve for piece 2.
- Rivet top hole based on teacher demo. Drill middle hole in piece 1 using piece 2 as a guide. Countersink and install 2nd rivet.
- Sand, polish, and finish (paint, lacquer, etc).
