Horizontal Metal Bandsaw
Purpose:
Horizontal band saws utilize a thin metal “ribbon like” loop with hardened teeth moving in a generally horizontal plane to cut metallic objects. The moving blade sweeps an arc thru a fixed cutting plane to produce repeatable fixed angle cuts. Only straight cuts at a fixed angle can be made on the horizontal band saw. An integral vice is always used to clamp the work piece in position for cross-cut of material. A hydraulic valve controls the downward cutting pressure and thus the effective cutting rate of the saw. (paragraph credit to https://ehs.yale.edu/ )
Horizontal band saws utilize a thin metal “ribbon like” loop with hardened teeth moving in a generally horizontal plane to cut metallic objects. The moving blade sweeps an arc thru a fixed cutting plane to produce repeatable fixed angle cuts. Only straight cuts at a fixed angle can be made on the horizontal band saw. An integral vice is always used to clamp the work piece in position for cross-cut of material. A hydraulic valve controls the downward cutting pressure and thus the effective cutting rate of the saw. (paragraph credit to https://ehs.yale.edu/ )
Hazards:
Particular hazards associated with horizontal band saws are listed below. Note that the list is not exhaustive as unusual or specialized uses may generate additional unique hazards.
Crushing / Pinch Points:
• The downward swing of the cutting head creates pinch points along the cutting plane axis.
• Only grab/ hold cutting head at the outboard end of the assembly.
• Be sure that work piece is the only object in the path of cutting plane/blade prior to lowering cutting head.
Amputation:
• The fast moving cutting blade/band will quickly remove fingers.
Cut and laceration:
• Sharp edges are created by the cutting action.
• Multiple stationary and moving blade hazard.
• Blades can break and be thrown out of the work zone.
In-running nip pinch point:
• The moving blade can catch loose hair, clothing, gloves and pull body parts into cutting edges.
• The work piece must be firmly supported by table at all times or body parts can become pinched.
Hot objects:
• The cutting process can generate significant heat in the work piece and scrap material.
These saws are designed for efficiently cutting metal stock. Cooling/cutting oil is used to assist in
the cutting process to prolong blade life and allow for high quality cuts in work pieces without
heat distortion or damage.
• Only objects that can be clamped in the machine vice may be cut on this saw.
• Only straight cuts can be made. However, the angle of the cut can be preset to angles other that 90 degrees by adjustment of the vice jaws prior to powering up the machine. Generally cuts up to 45 degrees can be made in this fashion.
• With supervision approval, these saws may be used for cutting plastic stock. During these cuts the lubrication system would be turned off and cuttings must be cleaned out of the cutting tray.
(paragraph credit to https://ehs.yale.edu/ )
Above: This image shows how the wheels and blade move during operation. NEVER OPERATE THE BANDSAW WITH THE BLADE GAURDS OPEN!
Training Competencies:
- Identify and describe all controls, adjustments, and functions of the band saw.
- Dress appropriately and wear appropriate personal protective equipment for the cutting operation.
- Correctly setup and adjust the band saw for all types of required cuts.
- Apply good judgment in selecting clamping/securing method for work piece and accurately position work piece for cutting operation.
- Students must be able to reset all saw functions and clean up saw in preparation for next user.
Horizontal Bandsaw Basic Operation and Safety
Before you start:
Once you can confirm all the above you can start!
To start the cut:
1) Reset the red emergency button
2) Press the green button to start the blade movement
3) Turn the hydraulic downfeed dial to on
4) Stay with the machine as it begins to cut
5) Turn the blade and hydraulic dial to off after the cut
6) Safely retrieve your piece. **
**You may need to let your material cool down before retrieving it. Use a file or grinder to smooth out any burrs or sharp edges that have resulted from the operation so you don’t cut yourself.
Before you start:
- Is long material supported by the stand?
- Do you have your eye protection?
- Is the red emergency button off?
- Is the hydraulic downfeed control off?
- Is the hydraulic downfeed speed set to 3 (for most materials)?
- Are the clamps tight to prevent your material from slipping when being cut?
- Is the blade slightly above your material but not touching?
- Does your material require coolant while cutting?
Once you can confirm all the above you can start!
To start the cut:
1) Reset the red emergency button
2) Press the green button to start the blade movement
3) Turn the hydraulic downfeed dial to on
4) Stay with the machine as it begins to cut
5) Turn the blade and hydraulic dial to off after the cut
6) Safely retrieve your piece. **
**You may need to let your material cool down before retrieving it. Use a file or grinder to smooth out any burrs or sharp edges that have resulted from the operation so you don’t cut yourself.
| horizontal_bandsaw_operation_and_safety.pdf |
The Parts of the machine and how to use them!
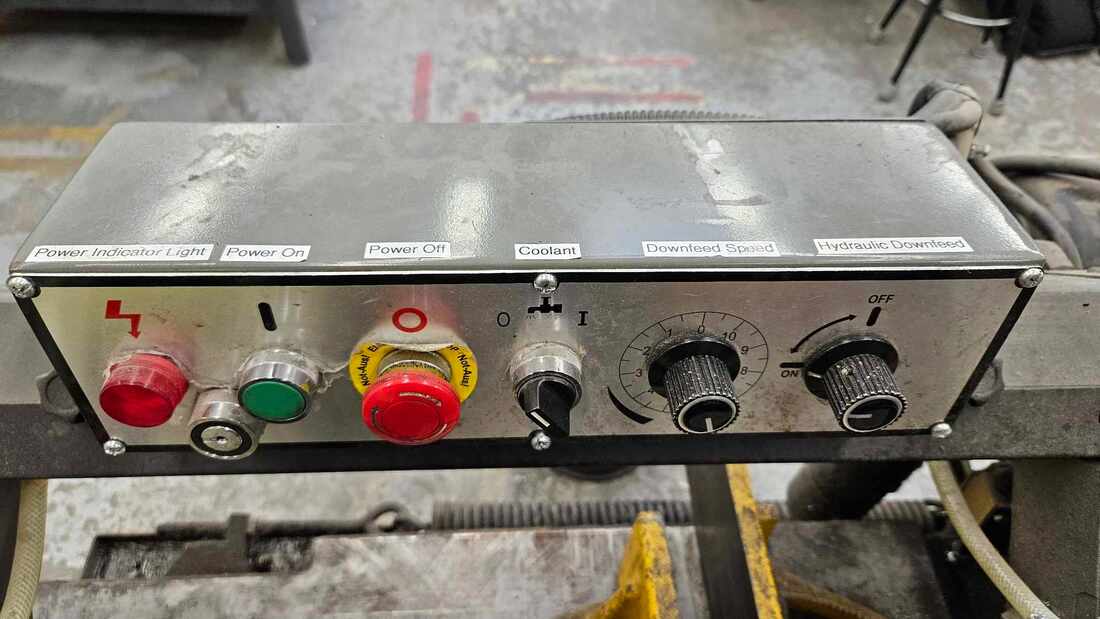
The Horizontal Metal Bandsaw Control Panel has 6 labels showing what each button or dial does:
|
Power Indicator Light:
Power On
Power Off
|
|
|
Coolant
|
|
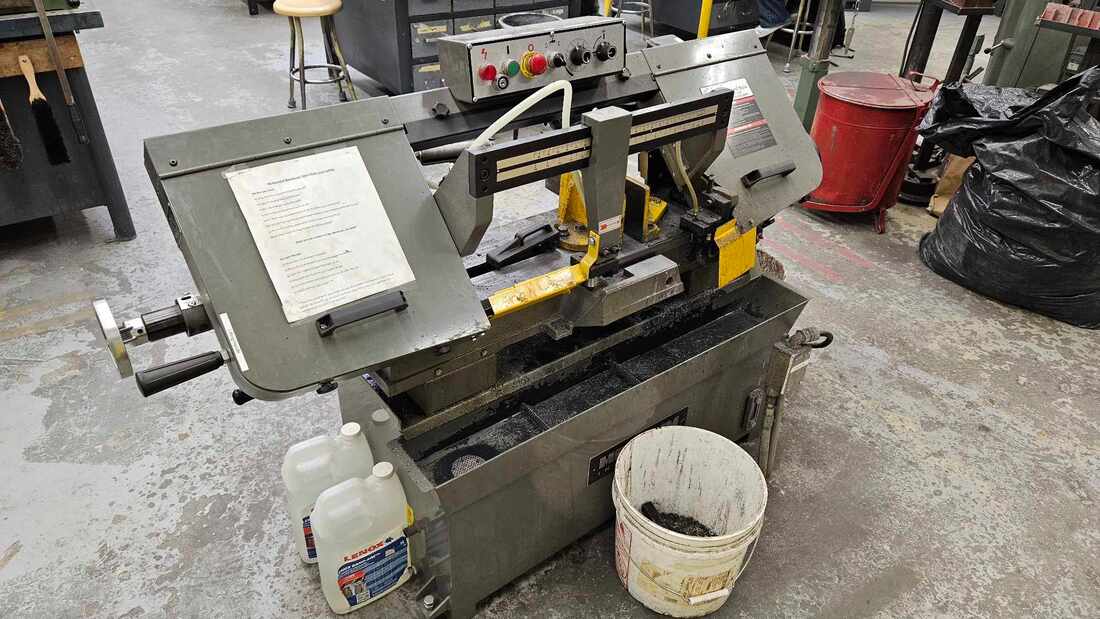
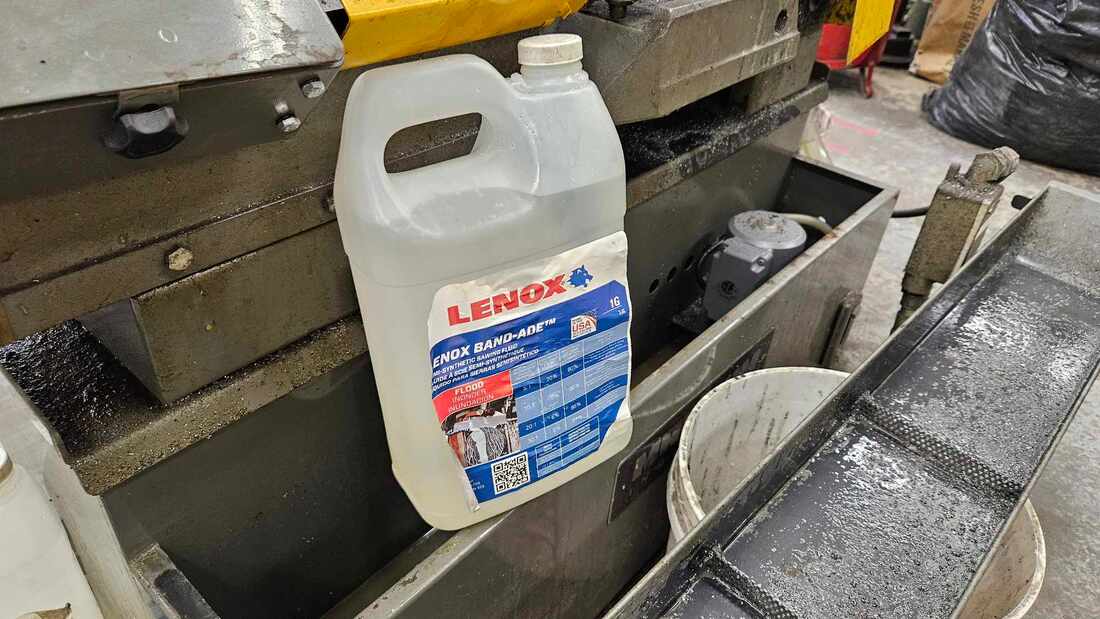
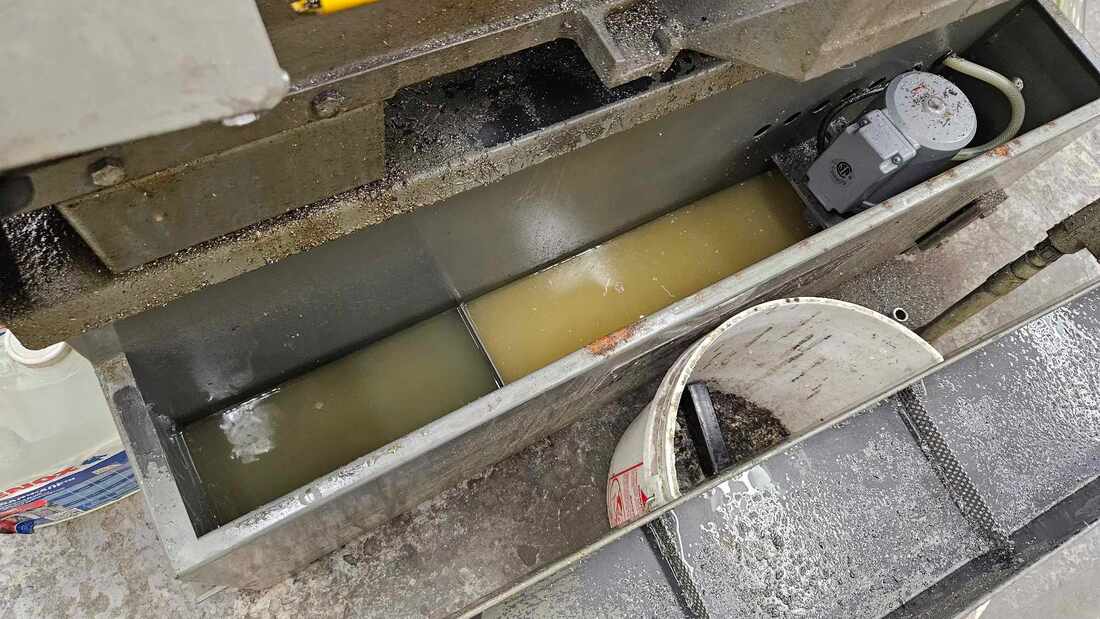
Below the horizontal bandsaw is shown with the chip tray removed. We use a 10:1 - 30:1 mix of Semi-Synthetic Bandsaw saw fluid and water. Do not let metal fall into the coolant reservoir as it can ruin the pump and/or motor.
The teacher will be the one to mix and add fluid if needed. See the teacher if no coolant is coming out.
The teacher will be the one to mix and add fluid if needed. See the teacher if no coolant is coming out.
When cutting long hollow pipe or tube please add a bucket to any end that could leak coolant onto the ground. During the cut there is usually a chance for the flood of coolant to travel down the hollow material and make a mess on one or both sides. Use a clean bucket and pour the coolant back into the chip tray so it can be filtered on it's way to the coolant pump
Above: a clean bucket catching excess cutting fluid/coolant that can be reused and poured back into the chip tray when the operation is complete.
Downfeed Control
Downfeed Speed
Hydraulic Downfeed
The hydraulic downfeed cylinder is controlled with an ON/OFF dial. Leave it in the Off position when doing setup or when you are finished a cut. We never walk away from the horizontal bandsaw when it is in the ON position.
- The downfeed speed dial controls how slow or fast the bandsaw comes down. A recommended cutting speed for the majority of our metal is 3. If needing the bandsaw to quickly feed down during setup you may use a different speed but don't forget to put it back to 3 before cutting.
- Using a fast downfeed speed may overload the machine and/or blade causing damage. Each new blade is roughly $120 and we should be able to get one school year out of a new blade
Hydraulic Downfeed
The hydraulic downfeed cylinder is controlled with an ON/OFF dial. Leave it in the Off position when doing setup or when you are finished a cut. We never walk away from the horizontal bandsaw when it is in the ON position.
Below shows the Hydraulic down feed speed dial and On/OFF Control for the hydraulic cylinder set to a speed of 3.
3 is a good number and works for just about any of our materials regardless of it's size. Go slower for harder materials (stainless, high carbon steel, etc)
3 is a good number and works for just about any of our materials regardless of it's size. Go slower for harder materials (stainless, high carbon steel, etc)
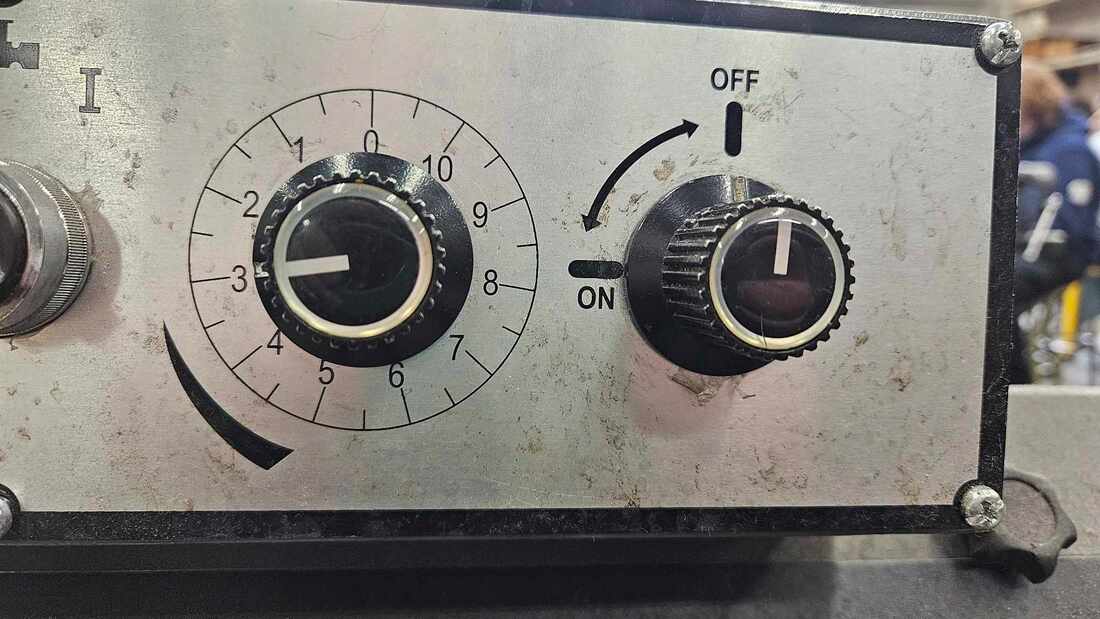
The image below shows what the bandsaw does when you turn the hydraulic downfeed to ON at a speed of 10.
Please do not cut that fast! The general downfeed speed we use is 3 for most material
Please do not cut that fast! The general downfeed speed we use is 3 for most material

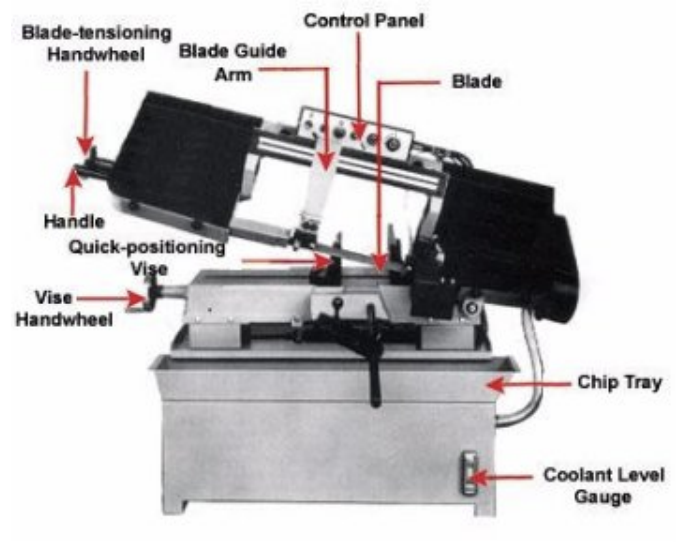
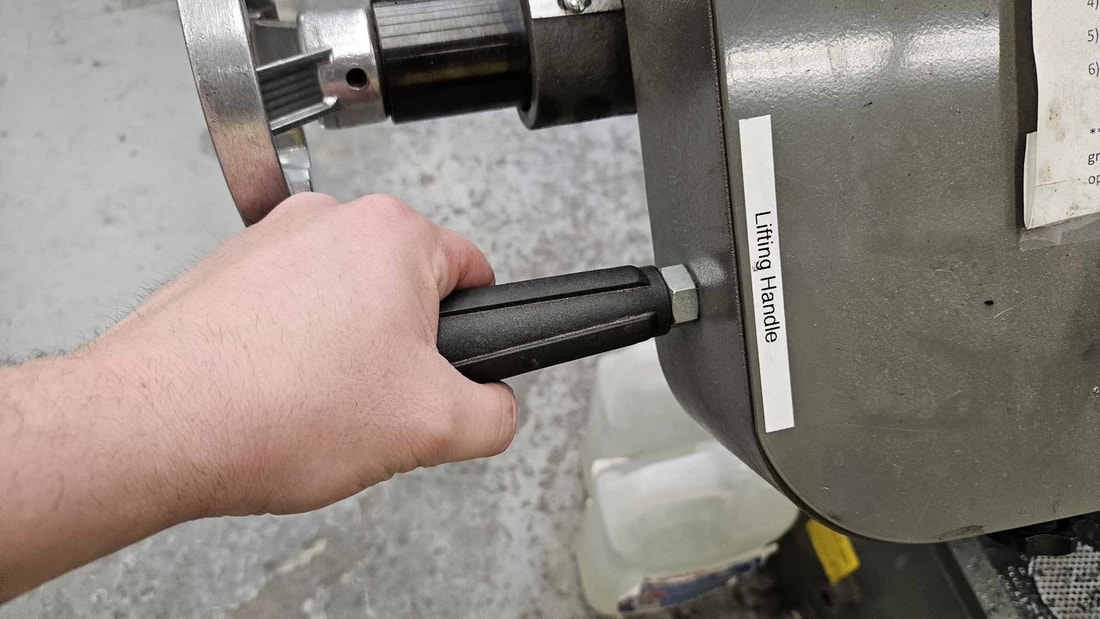
Lifting Handle
The lifting handle is the only part of the bandsaw that you should touch when lifting the horizontal bandsaw and needing to place material onto the cutting table.
DO NOT TOUCH THE BLADE TENSIONING HANDWHEEL. If you accidently spin the handwheel you could cause the bandsaw blade to fall off or overtighten
DO NOT TOUCH THE BLADE TENSIONING HANDWHEEL. If you accidently spin the handwheel you could cause the bandsaw blade to fall off or overtighten
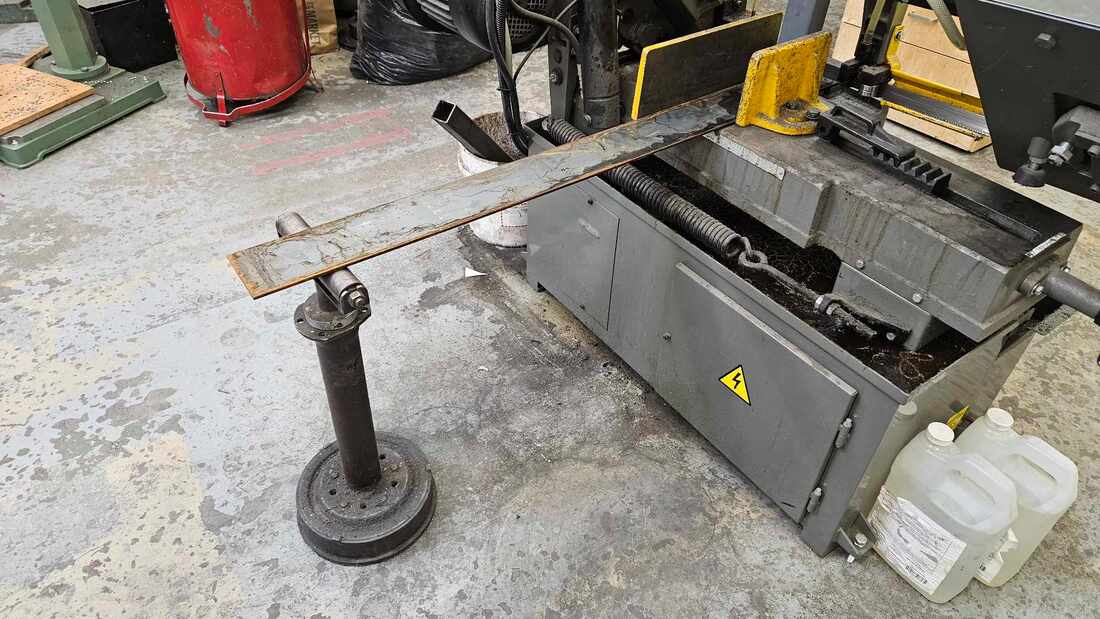
Supporting long material
If you material extends more than 1 foot from the bandsaw or isn't able to balance safely then a support is required to keep it level.
|

|
Blade Guide Arm
You can adjust the "Blade Guide Arm" to accommodate different widths of material.
You can adjust the "Blade Guide Arm" to accommodate different widths of material.
- The white "metric and imperial ruler" is pretty much useless as it doesn't actually line up with the width of what you are cutting.
- If you need to adjust the width please use and handle shown in the 2nd image. When the guide arm is loose you can slide slide it left or right to fit your metal. Your blade guide arm should be at least 1 inch wider than your material

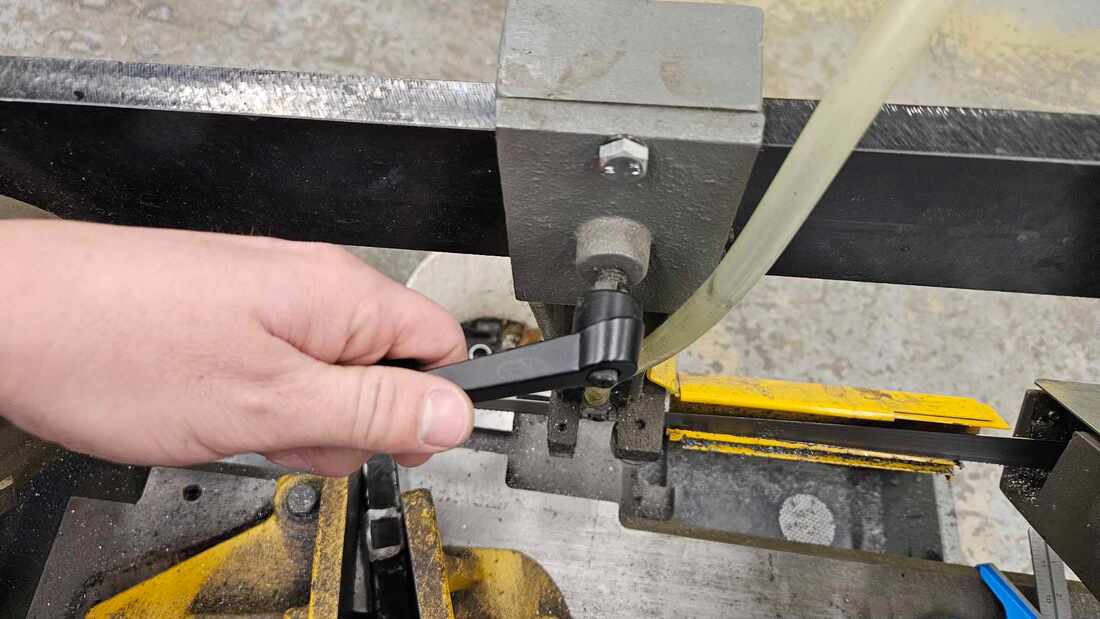
Above is the handle that will adjust the Blade Guide Arm. Ensure it is tight and in place before starting a cut!
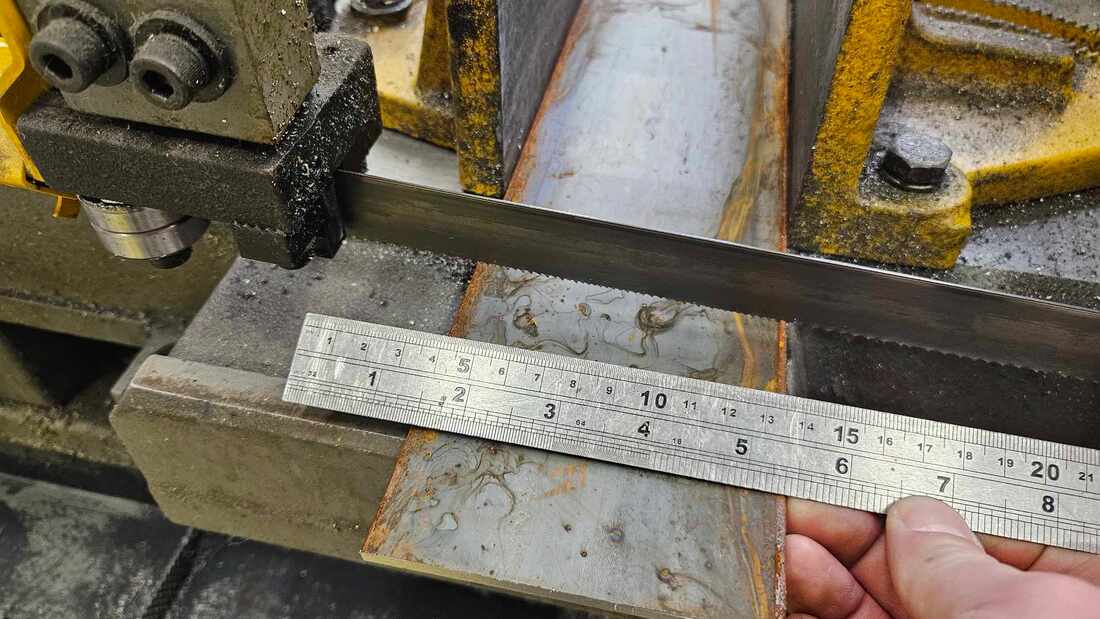
Below: This shows that the Blade Guide Arm is set to be a bit bigger than the width of the material being cut
Below: This shows that the Blade Guide Arm is set to be a bit bigger than the width of the material being cut
Holding your material securely with the quick positioning vise system
|
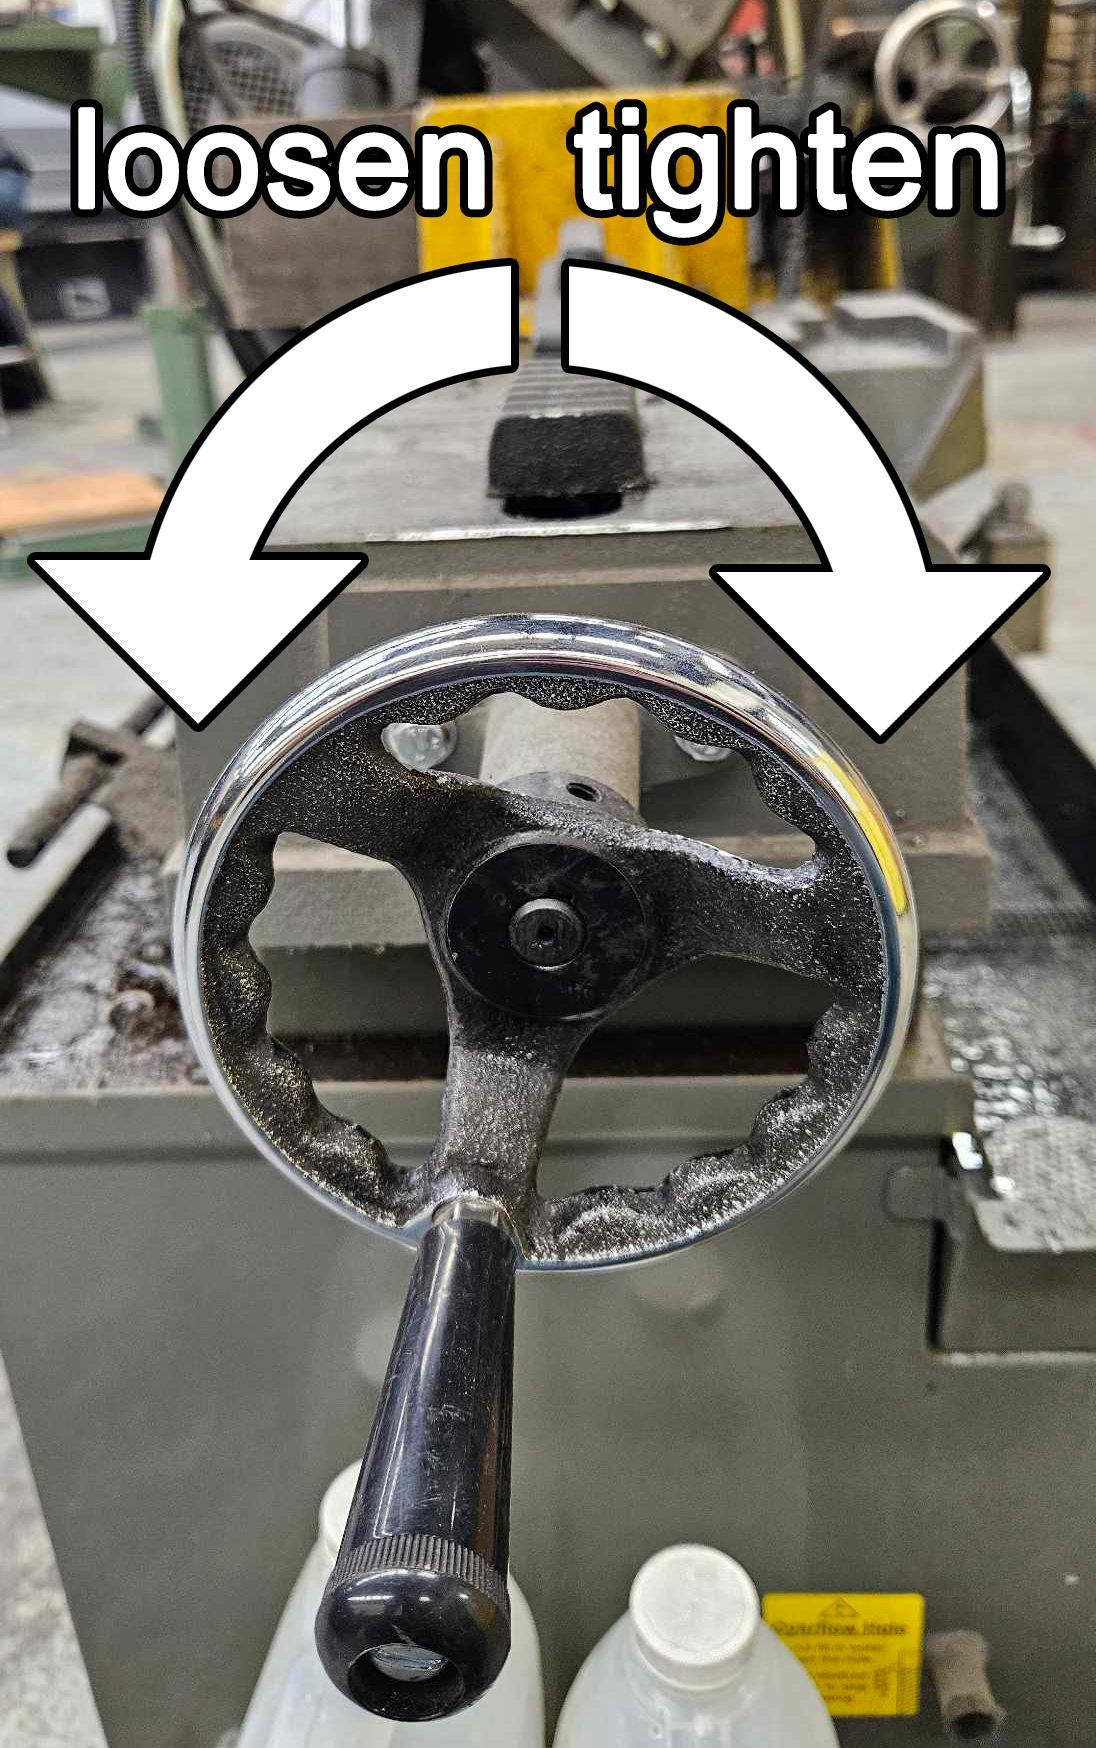
The Vise Handwheel will allow you to tighten the quick positioning vise to hold your material securely. Rotate it clockwise (right) to tighten or counter-clockwise (left) to loosen.
|
|
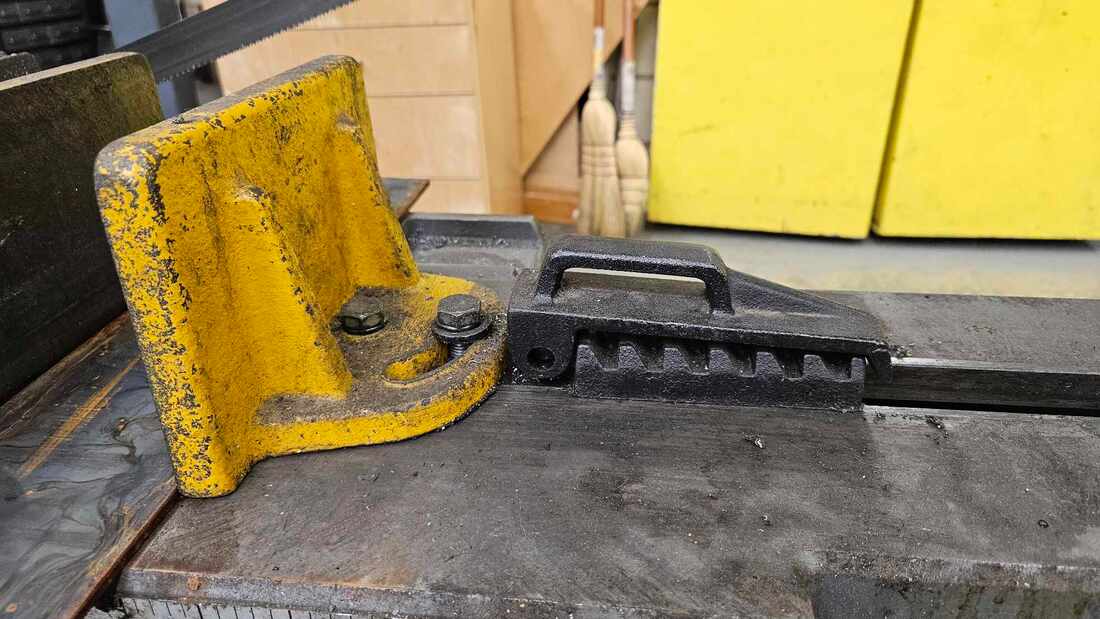
Quick positioning vise
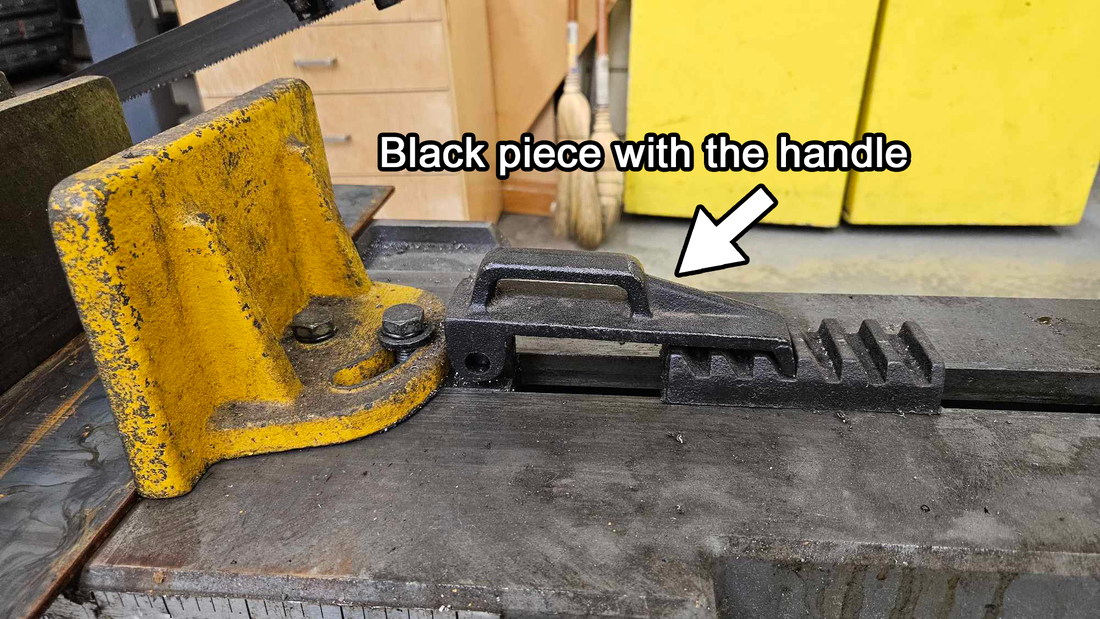
Below: This is a good example of how to set the quick positioning vise to hold your material securely during a cut. You can see that the "black piece with the handle" fits nicely in the grooves.
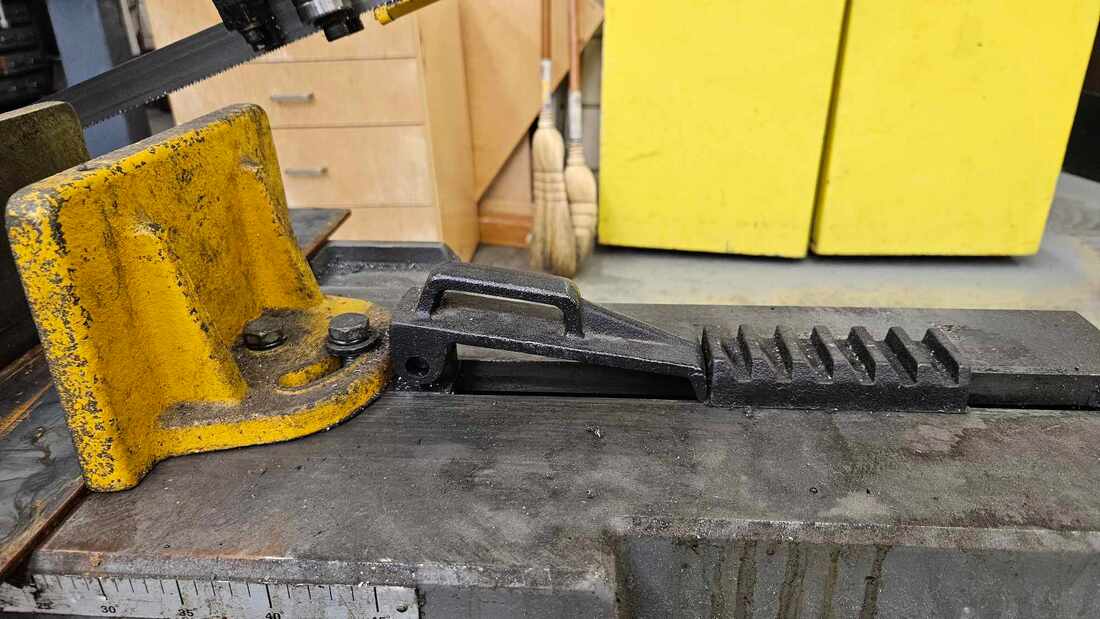
Below: The end of the quick positioning black handle is not in any grooves. This may result the material not being held securely during a cut. Fix it!
Below: The black quick positioning handle is in front of the grooves and while it might still be tight it is not our best practice.
How the metal should be held in the quick-positioning vise
Your material should be flat on the table without a gap below and with it's widest part flat on the table.
For metals and harder materials aim for 6 – 24 teeth in the workpiece.
Some things to note:
For metals and harder materials aim for 6 – 24 teeth in the workpiece.
Some things to note:
- Too few teeth touching may straddle the work and break teeth.
- Too many teeth touching can cause gullet overload and strip teeth.

Below: This metal looks "horizontal" and not "vertical". This is good.
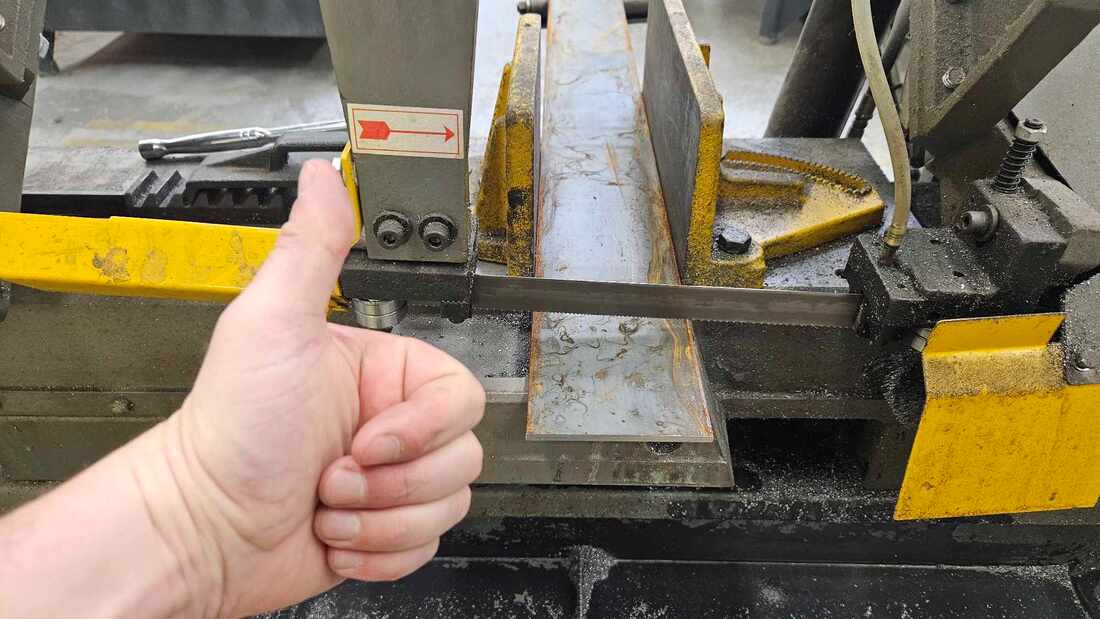
Below: The metal is flat on the table. This is good.
Below: The metal only allows for 3-4 cutting teeth to make contact and it will most likely vibrate (due to material thickness) when cutting causing terrible noises and prematurely wearing down the blades teeth. All bad things.
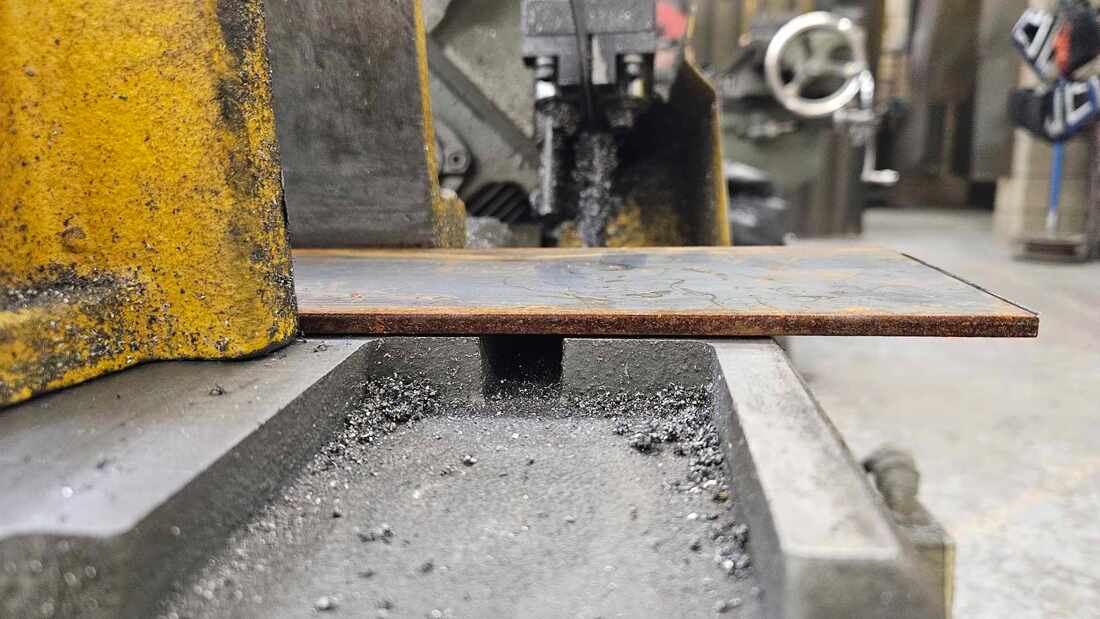
Below image: This material is not resting flat on the table. It will probably still cut but is not the best practice when using the horizontal bandsaw. Being off the table can also result in material vibrations which sounds terrible and prematurely wears down the blade.
Make sure your material is flat when tightening the Vise Handwheel. Fix it if needed!
Make sure your material is flat when tightening the Vise Handwheel. Fix it if needed!

Changing the cutting angle
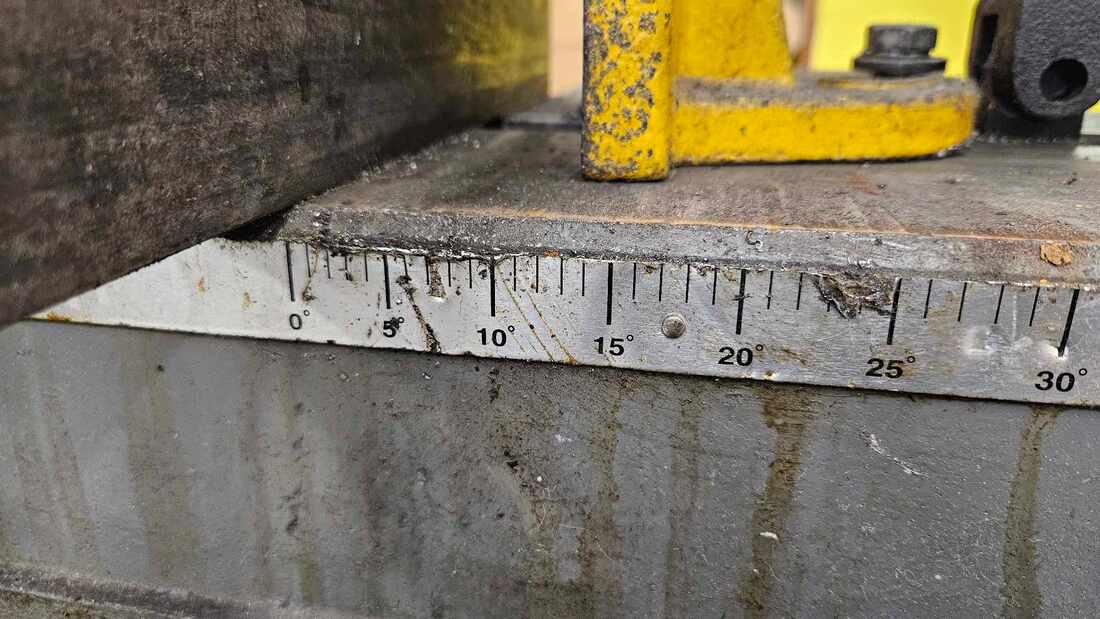
There are 4 bolts that need to be loosened (not removed!!!) if you want to cut an angle on the end of your material. There is a degree guide on the back of the machine that allows you to measure fairly accurately.
Below: This shows the fence is set to 0 degrees which will result in a perpendicular cut across the material
Below: This shows the fence is set to 0 degrees which will result in a perpendicular cut across the material
Below image: Loosen each of the four bolts so that the yellow parts of the vice can pivot to the correct angle. Tighten the 2 bolts on the longer yellow piece first once your desired angle is set. Push the shorter clamp side (pictured on the right) using the handwheel so it is tight and parallel to the larger one. Ensure you tighten those two bolts next and this will help to clamp your pieces.
Tip: Your material must always be long enough to be clamped securely. If the length of the piece is not long enough to extend past the center of the vice or out the other side you may need a different method of cutting. If your workpiece break free and moves during a cut it can damage the cutting blade.
Tip: Your material must always be long enough to be clamped securely. If the length of the piece is not long enough to extend past the center of the vice or out the other side you may need a different method of cutting. If your workpiece break free and moves during a cut it can damage the cutting blade.
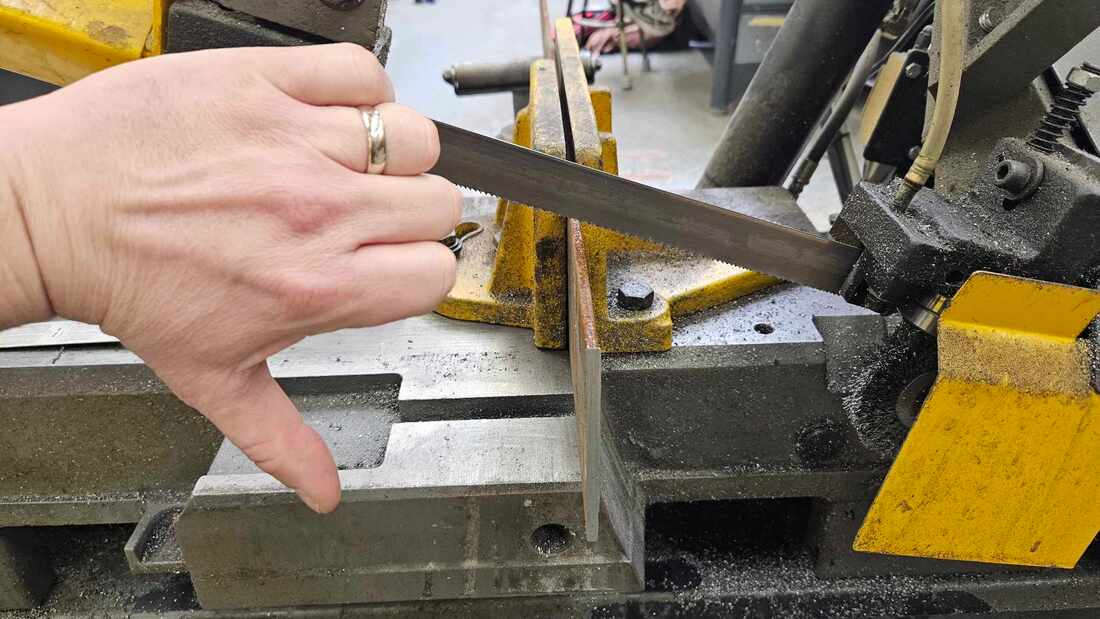
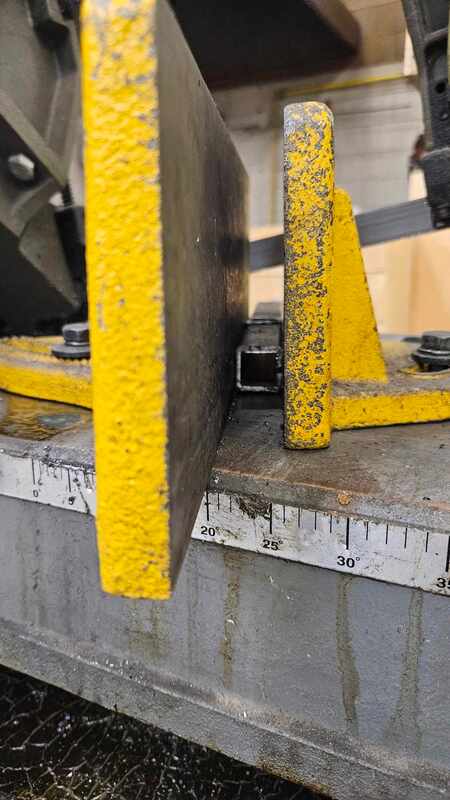
Below: This shows a piece of square tubing clamped in placed and ready for a 20 degree cut. It is long enough that the piece lines up with the bolts or middle of the clamping vice. That is the minimum!
I would still recommend drawing your desired angle cut onto your metal with a protractor to check that the blade angle matches your desired angle.
I would still recommend drawing your desired angle cut onto your metal with a protractor to check that the blade angle matches your desired angle.
Reset the angle back to ZERO degrees when finished with angled cuts
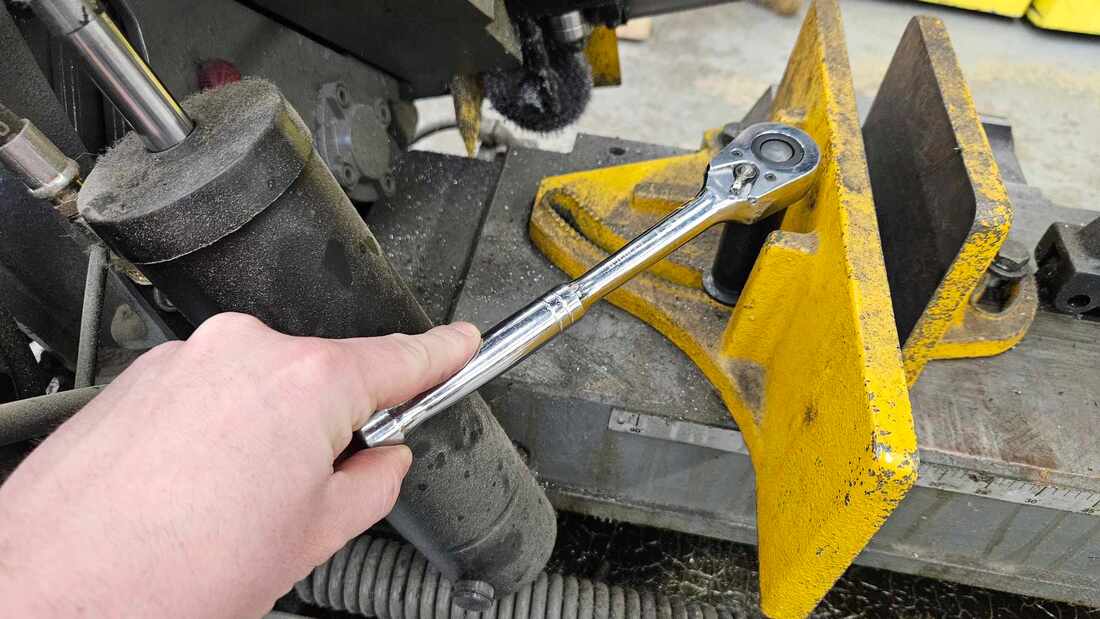
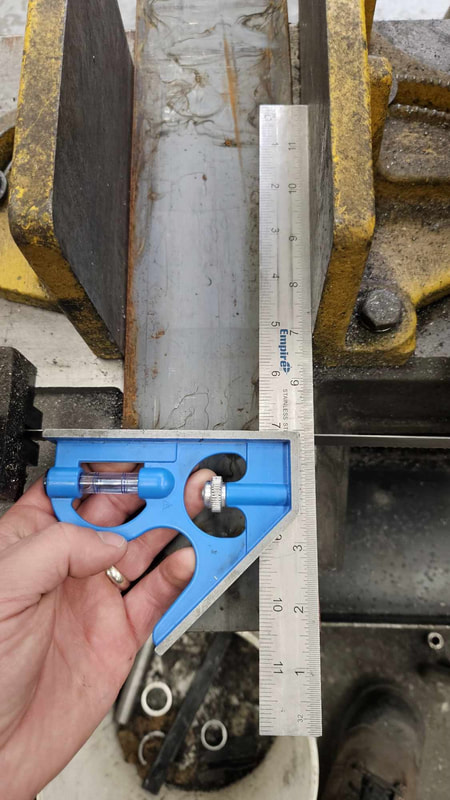
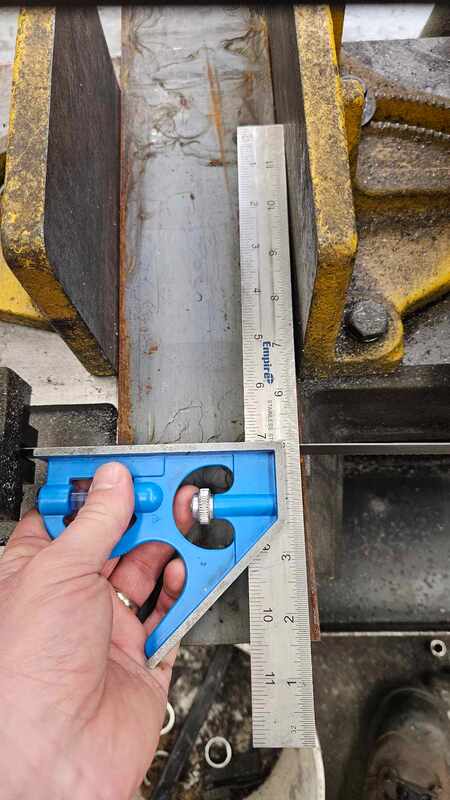
Using a square is the best choice when resetting the angle of the vice. Do not rely on the angle numbers on the rear of the machine. Ensure the vice is square to the blade by measuring it with a SQUARE. Once you can confirm that it is perfect please tighten all the required bolts.
|
Good 90 degree Measurement!
|
Not good measurement
|
Shut down and clean up procedures:
- Allow blade to come to a complete stop before releasing the vice and carrying out completion tasks
- When finished using the horizontal metal bandsaw please wipe down the table surface with a brush into the chip tray so that they next student using it has a flat surface to do their cutting.
- If the chip tray is getting too full of shavings and metal pieces please empty it into the bin. DO NOT LET SHAVINGS FALL INTO THE COOLANT RESEVOIR
- Please ensure the Yellow vice is clear of debris and reset back to 0 Degrees so the next student can have a straight cut
- Students must be able to reset all saw functions and clean up saw in preparation for next user
